CPE Scan#
CPE Scan is a feature that detects vulnerabilities in software that is not managed by the OS package manager, such as middleware, frameworks, and network device firmware.
Scanning is enabled by registering CPEs (Common Platform Enumeration), a global standard for software identifiers, in FutureVuls. For an overview of CPE, please refer to the "CPE Overview by IPA".
Example Scan Targets#
CPE scanning is effective for detecting vulnerabilities in software "other than" OS packages and programming language libraries, such as the following:
For more details on scanning network devices, please see "Scanning Network Devices".
- Network device firmware: Cisco, Fortinet, Palo Alto Networks, etc.
- Commercial middleware: Oracle Database, JP1, etc.
- Manually installed software: Apache, Tomcat, etc.
Differentiating from Other Scan Functions
- To detect OS vulnerabilities, package scanning with a scanner is more accurate, so detection via CPE is not recommended. For details, please see "Registering CPEs for OS Packages".
- To scan programming language libraries, we recommend using the more straightforward "Application Scan".
CPE Scan Overview#
FutureVuls primarily uses information from the NVD, a vulnerability database provided by the U.S. National Institute of Standards and Technology (NIST), and VulnCheck NVD++, a vulnerability database provided by VulnCheck, to detect vulnerabilities. Vulnerabilities that do not have CPE information registered in these data sources cannot be detected.
Information Referenced in NVD
FutureVuls' CPE Scan uses NVD's JSON Feeds as its source. Specifically, it uses the "CPE Configuration" field within the JSON Feeds for detection. This means that if the Configurations information is registered in the NVD, it can be detected, but if it is not registered, it cannot be detected.
Priority of NVD and VulnCheck NVD++
If the same vulnerability information is detected in both NVD and VulnCheck NVD++, the information from NVD will be prioritized. This is because NVD is based on manual analysis by experts, whereas VulnCheck NVD++ relies mainly on automated data collection, and we consider NVD to be superior in terms of information accuracy. However, vulnerability information that exists only in VulnCheck NVD++ will be included for detection to ensure comprehensive coverage.
Additionally, some vulnerabilities, such as those in Japanese domestic software, can be detected using information from JVN (see "Scanning Japanese Domestic Software (Using JVN)").
How to Register CPEs#
There are two ways to register CPEs: registering a CPE as new software on a server, or assigning a CPE to software already registered on a server.
Registering a CPE as New Software on a Server#
Register from the Software > Import Software section on the Server Details screen.

After Registering a CPE
Simply registering a CPE on a server will not detect the vulnerabilities associated with it. Vulnerabilities are detected when a scan is performed on the server where the CPE is registered.
If you want to detect them immediately, please perform a manual scan of the server.
1. Register by Selecting from a Drop-down List#
Search for the product and vendor name from the drop-down list. This list displays information registered in NVD and JVN as suggestions. Note that deprecated CPEs will not be retrieved in the CPE search.
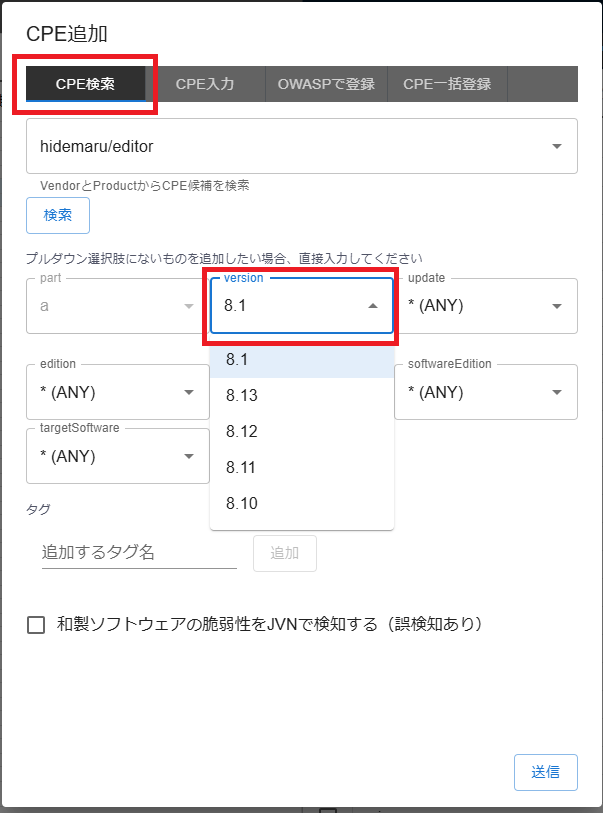
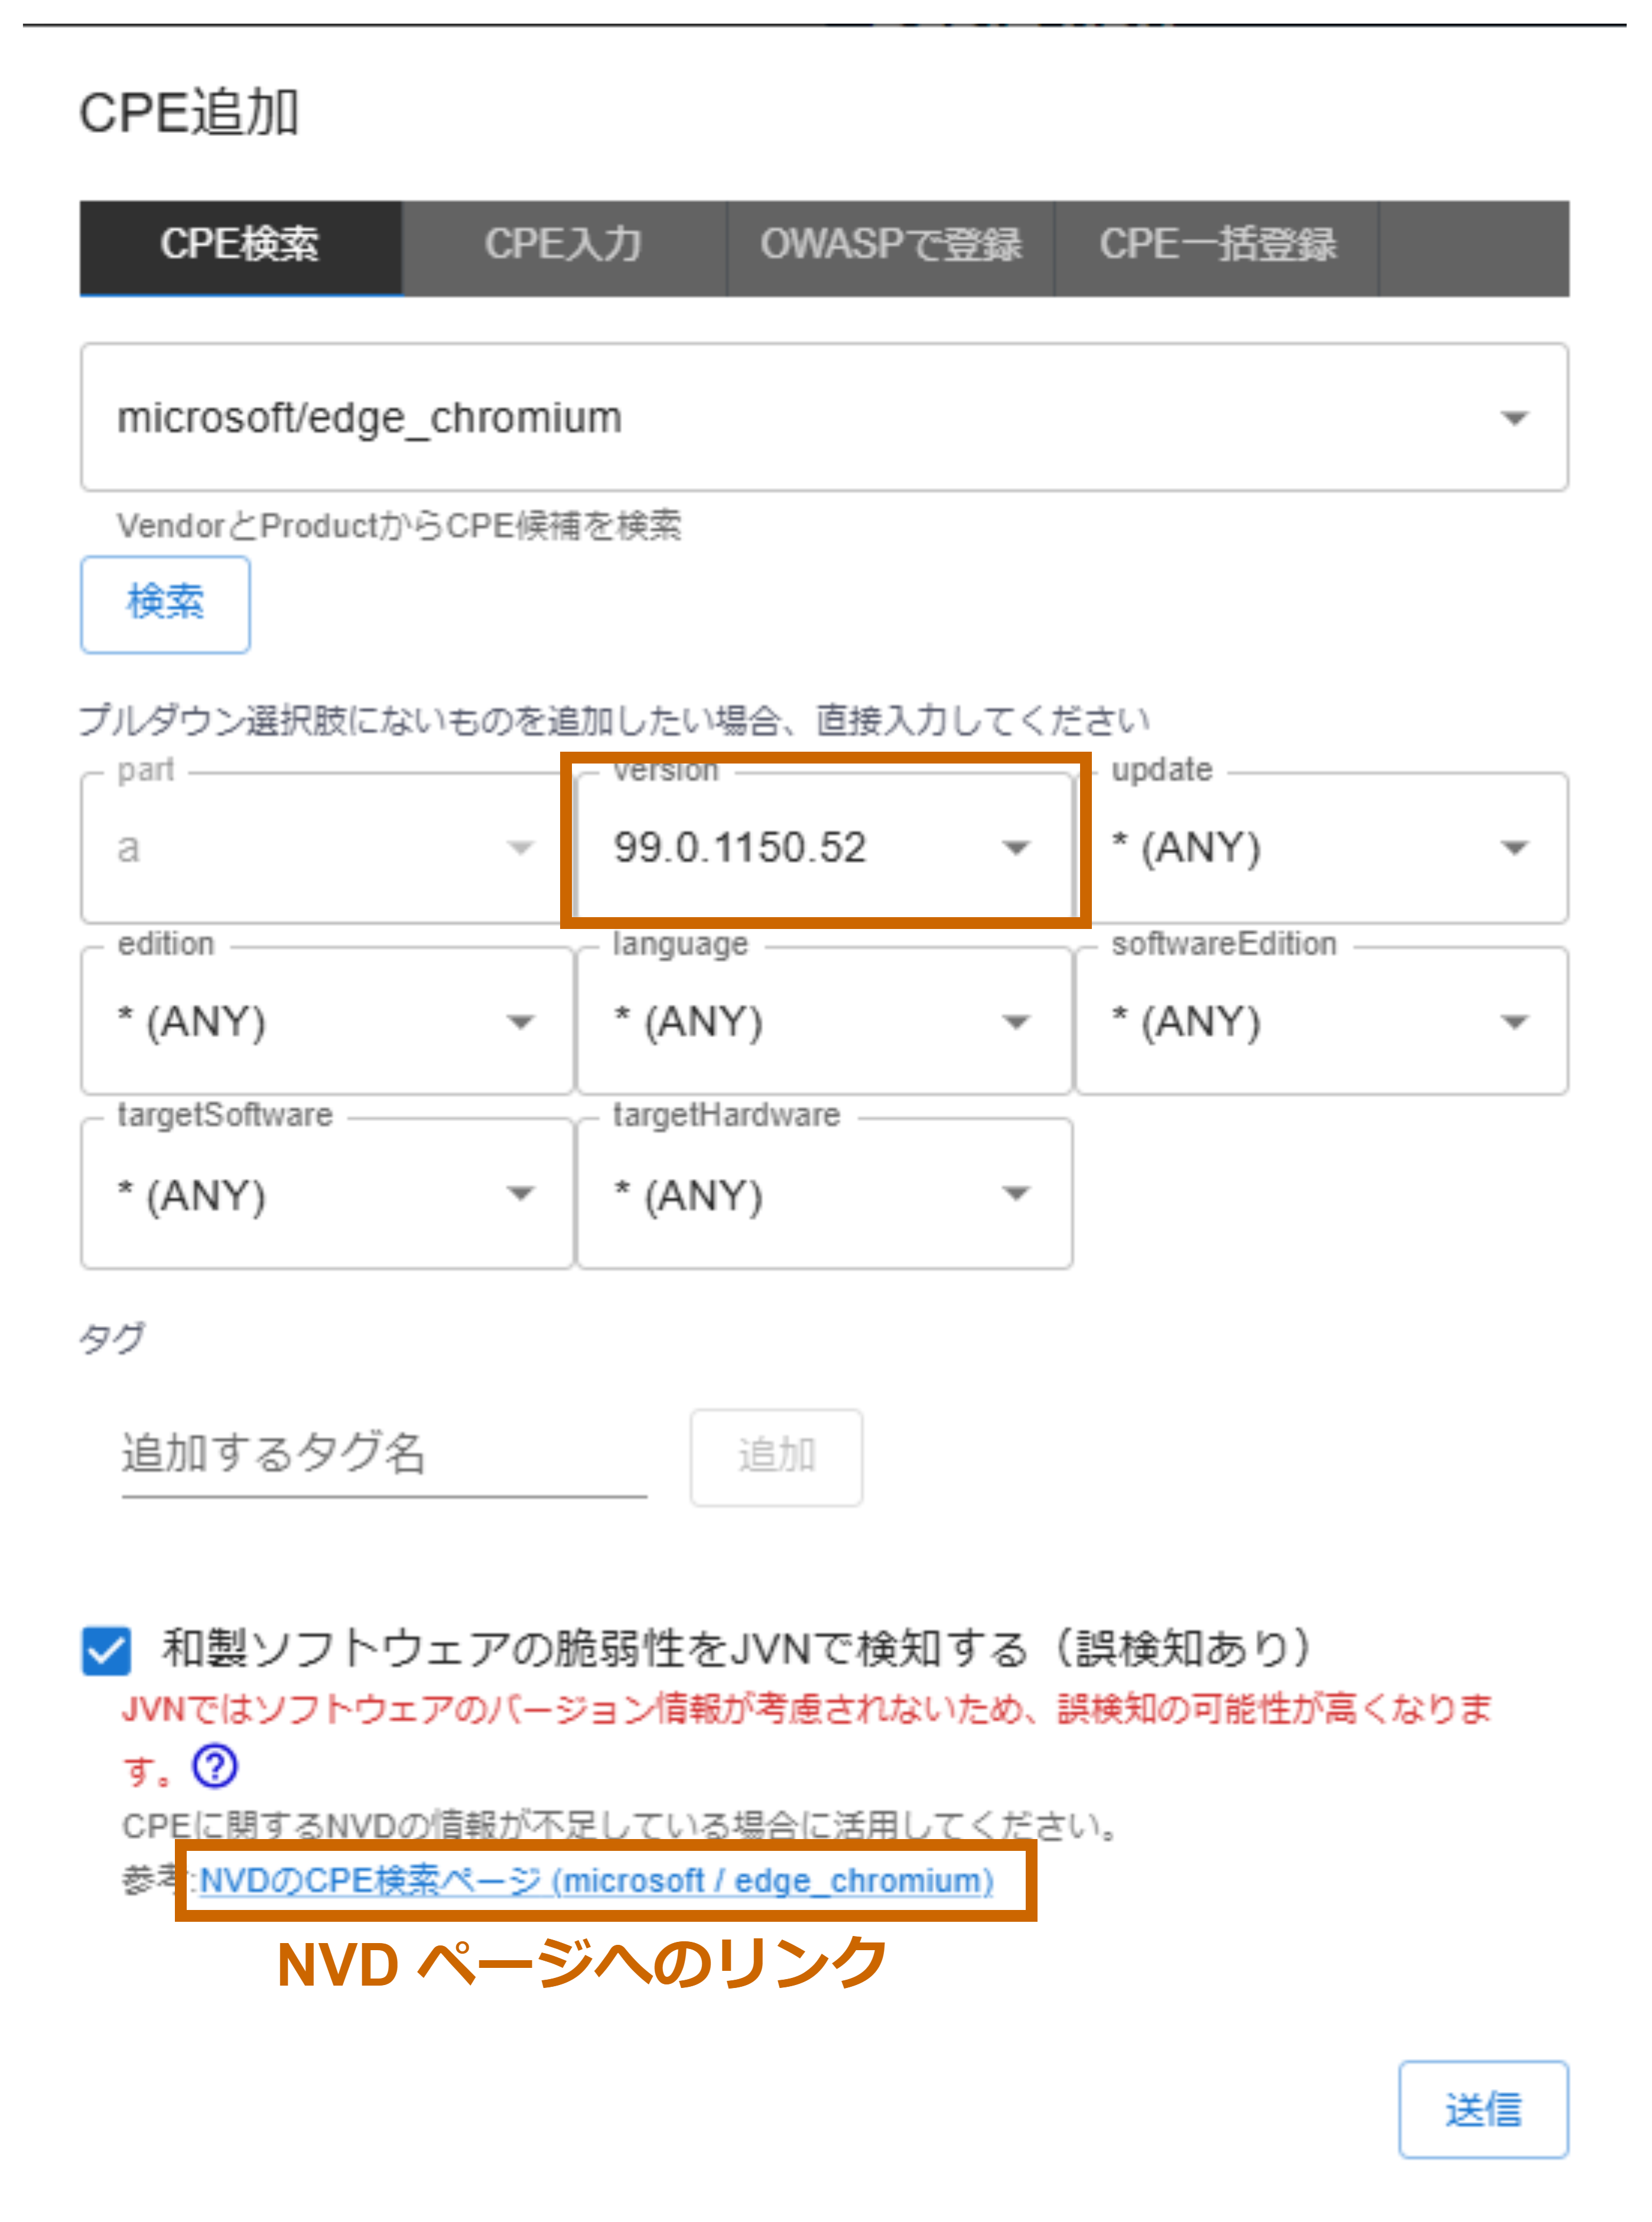
After selecting from the drop-down list, you can configure additional information such as the version. If your selection is not in the list, you can also enter it manually.
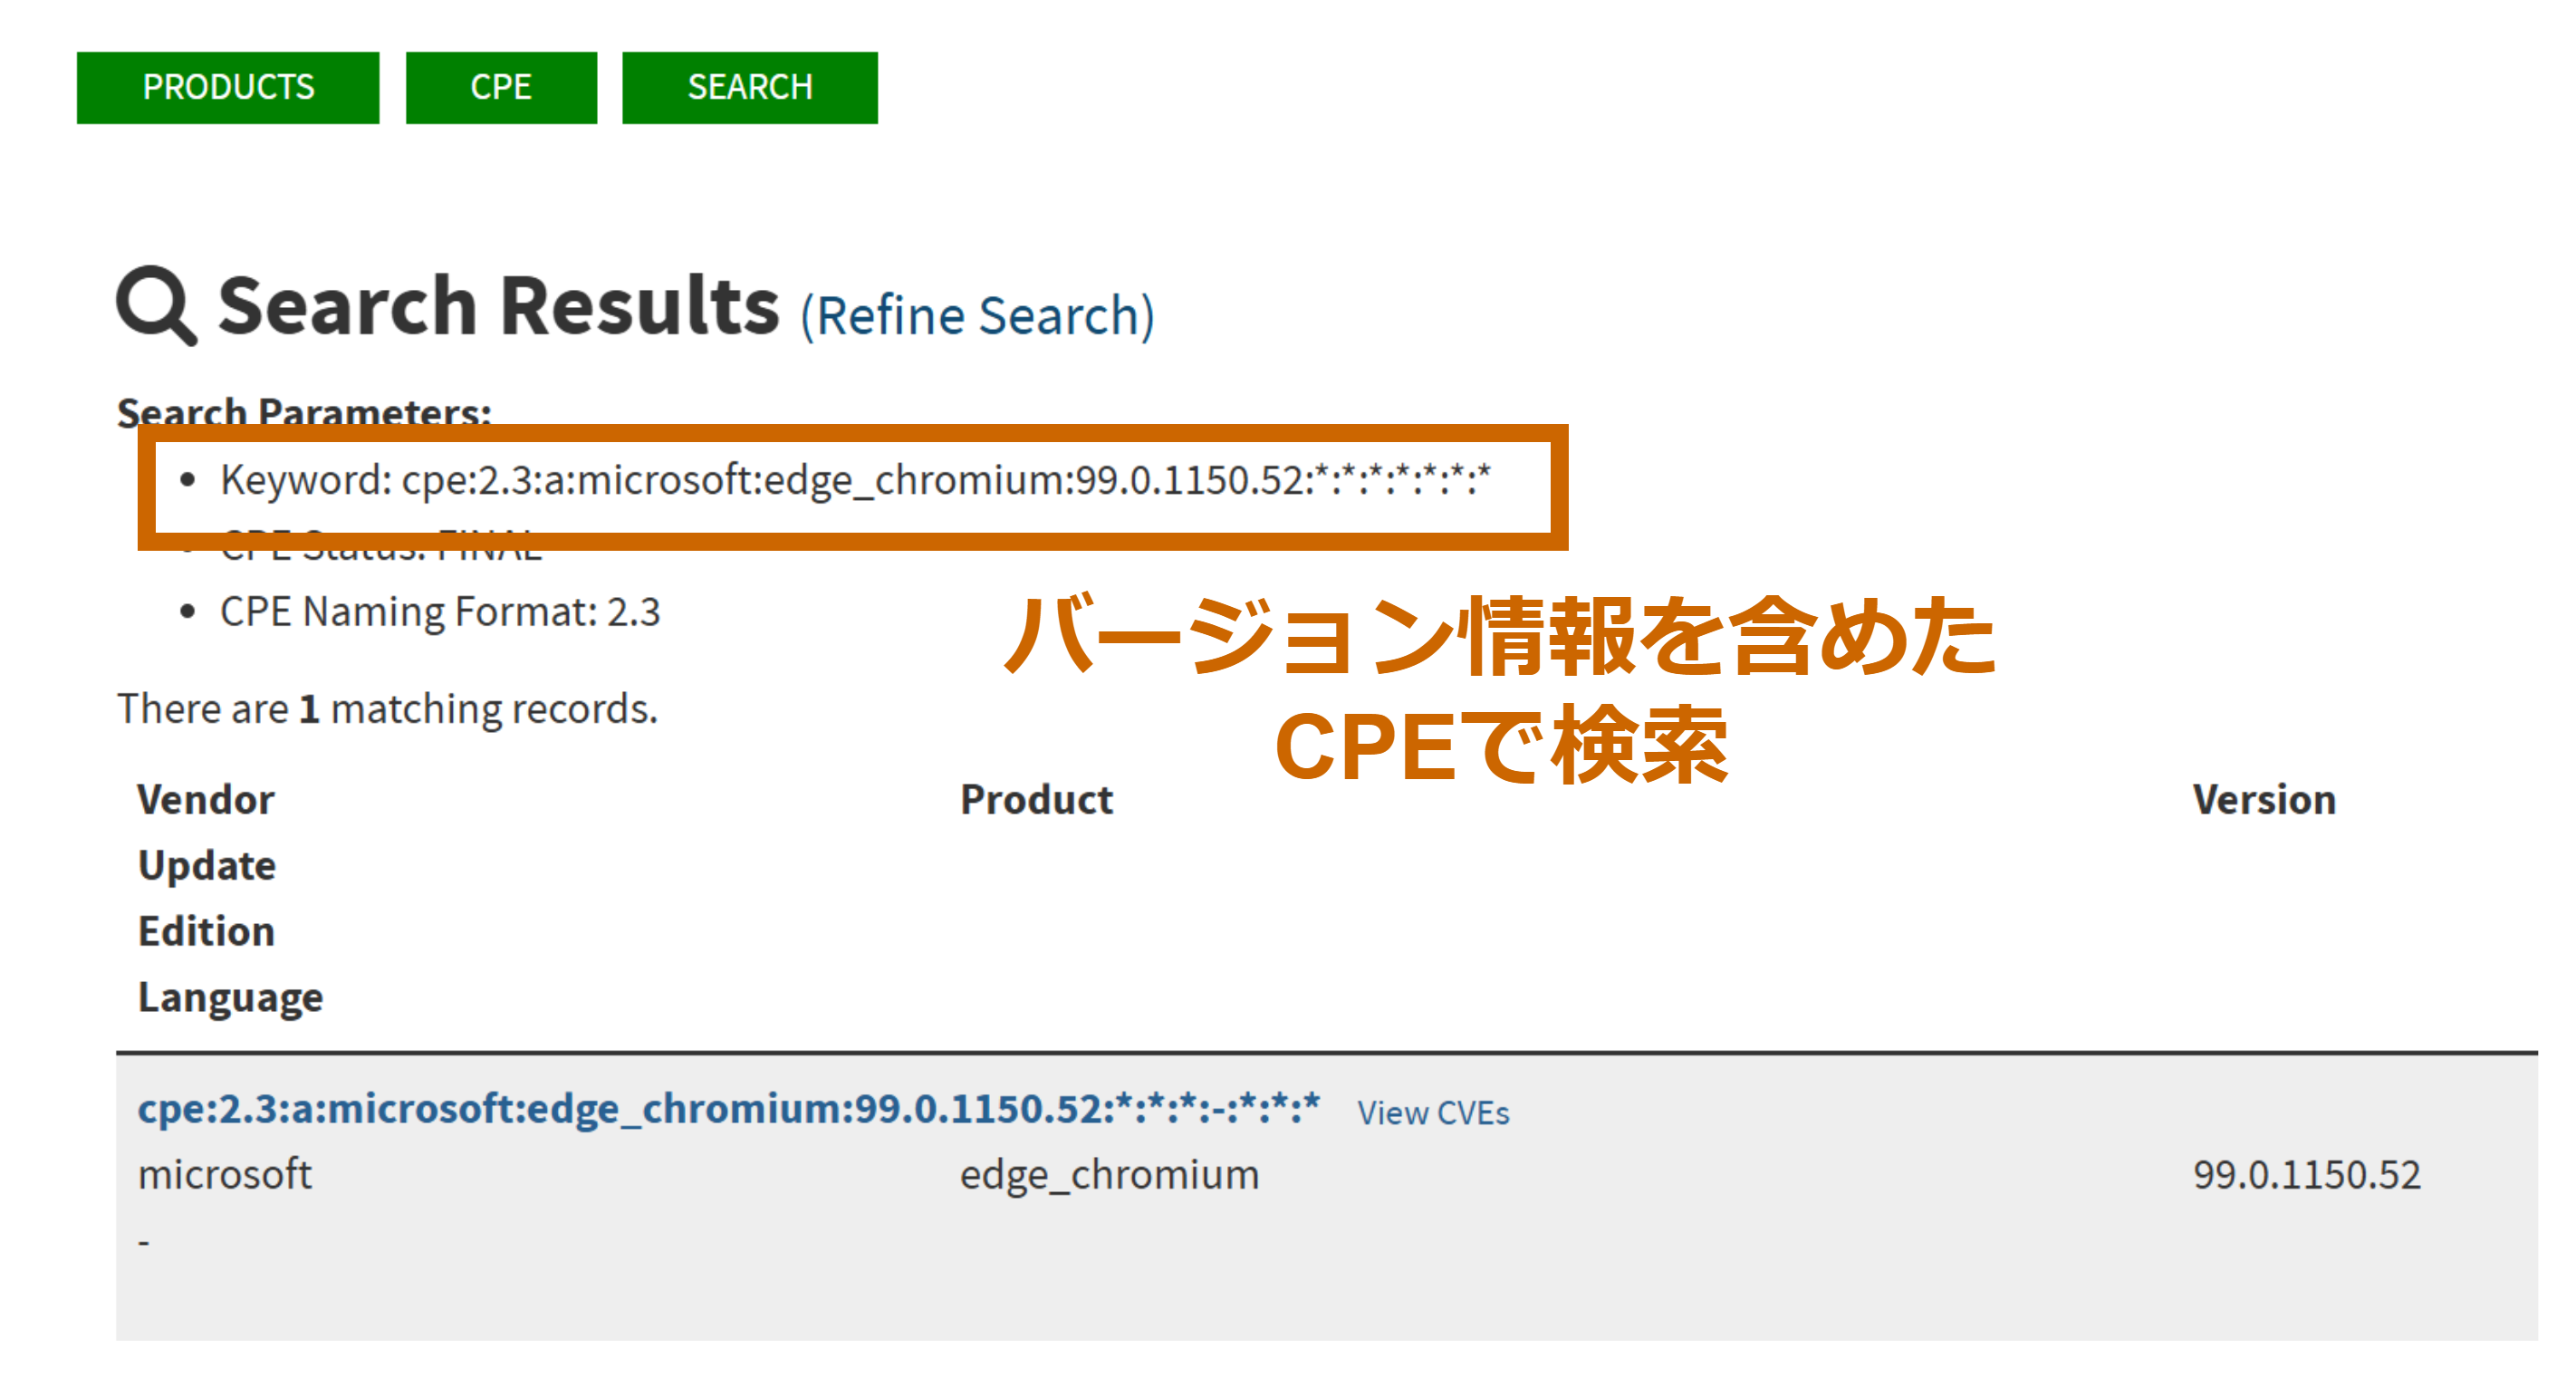
Click the "CPE Search Page on NVD" link to check if the corresponding CPE is registered in the NVD.
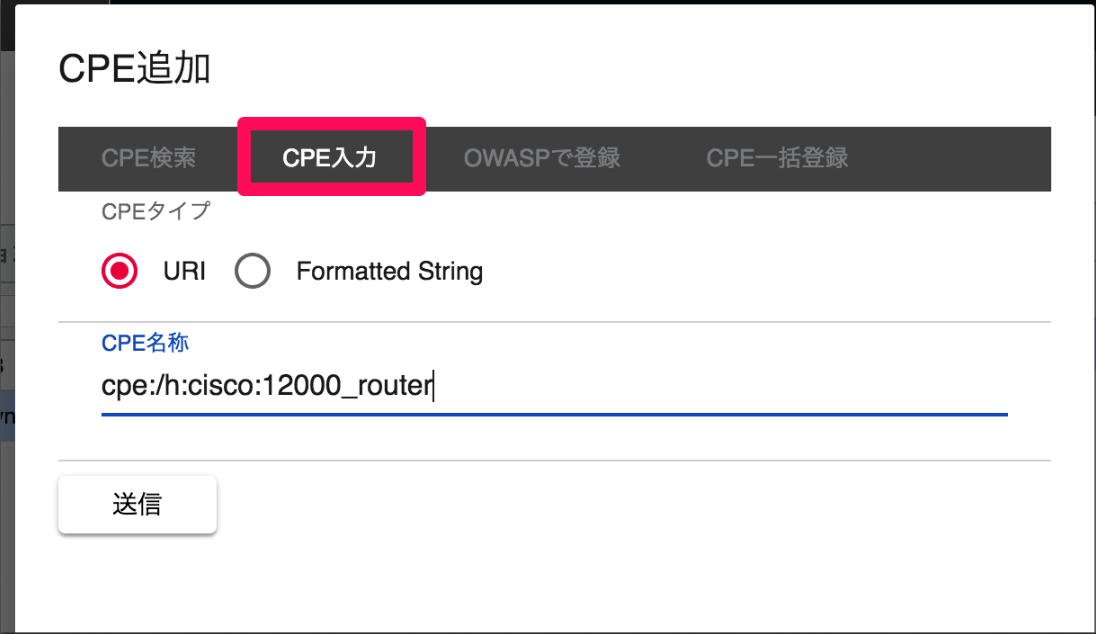
2. Direct Input in URI or Formatted String Format#
If you know the official CPE name (e.g., cpe:/a:apache:http_server:2.4.52), you can paste it directly to register it.
You can register using either of the following formats:
- URI format (e.g.,
cpe:/a:microsoft:internet_explorer:8.0.6001:beta) - Formatted String format (e.g.,
cpe:2.3:a:microsoft:internet_explorer:8.0.6001:beta:*:*:*:*:*:*)
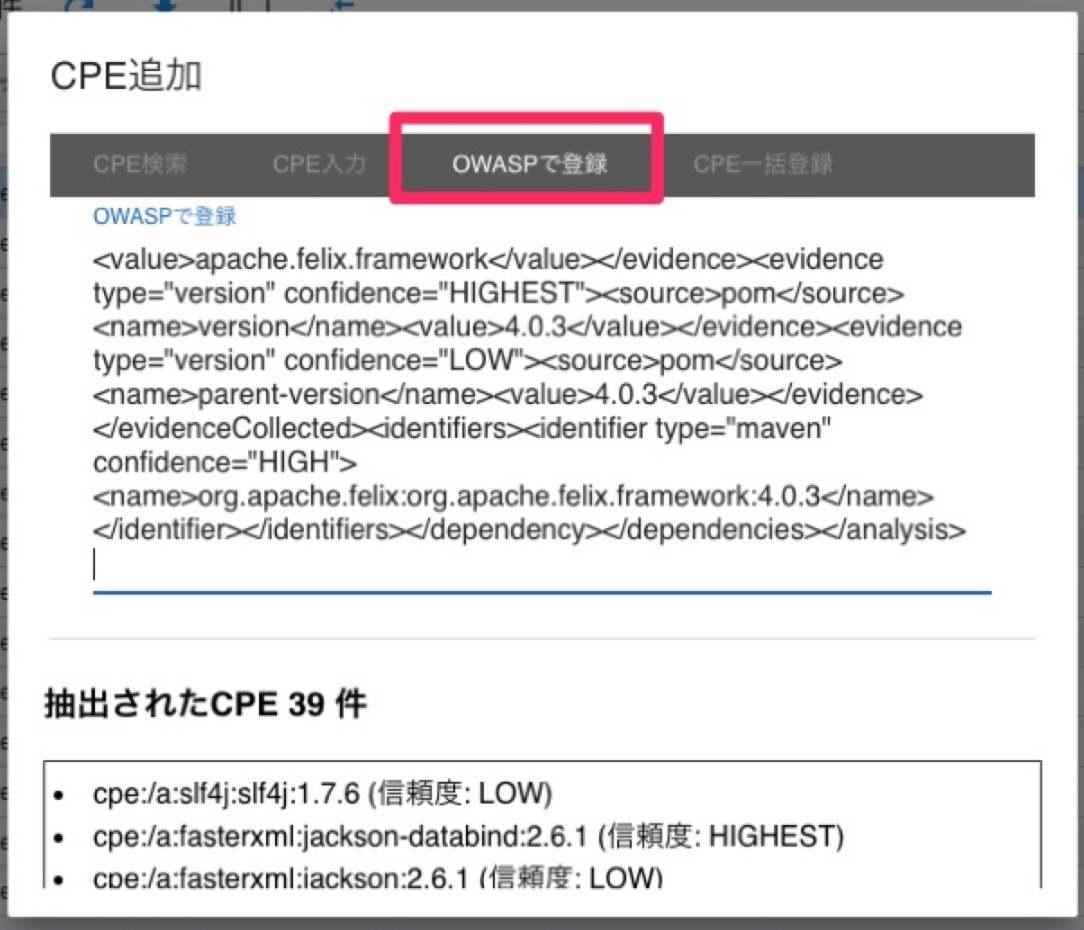
3. Bulk Registration from OWASP Dependency Check XML#
You can upload the output (XML file) from "OWASP Dependency Check" to register the CPEs of all detected libraries in bulk.
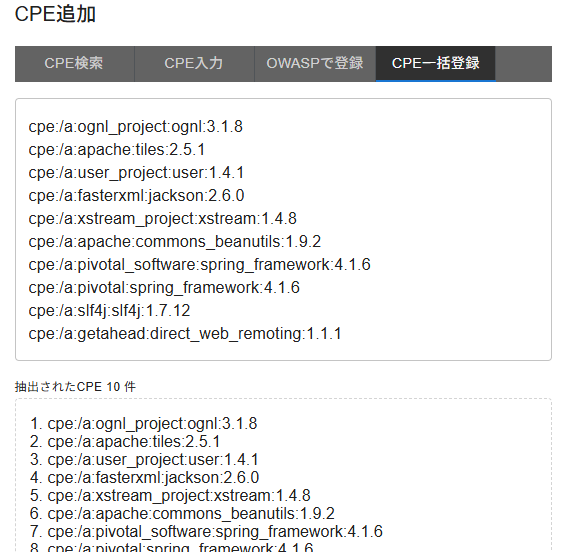
4. Bulk Registration via Free Text#
If you have multiple CPEs to register, you can paste them in text format to register them all at once.
5. Registration of Software in CSV Format#
Register software in CSV format as "Product Name,Version,Vendor Name". This allows you to bulk register software that was not automatically detected by the OS package manager.
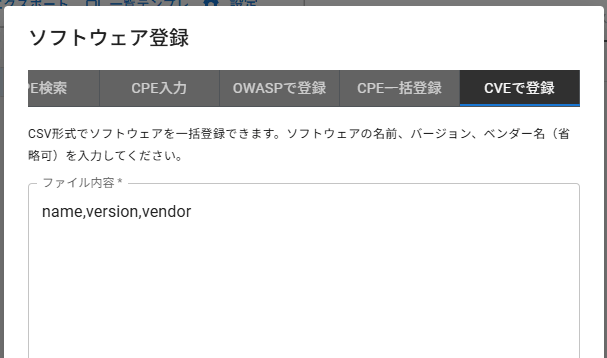
You can register by entering CSV data in the following format.
name,version,vendor
apache,2.4.54,apache
nginx,1.22.0,f5
- Software registered this way is not associated with a CPE, but vulnerabilities will be detected after performing a Manual Assignment of CPE/PURL.
- Each row of the CSV should follow the order: product name (name), version, vendor name (vendor).
- Product name and version information are required. The vendor name can be omitted.
- If you try to register software with the same product name as one already registered via CSV, the existing software's version and vendor name will be overwritten.
- To update the version of registered software, register the CSV data with the same product name again.
- Do not include the header row from your input file; only enter the software entries below the dialog's default header.
6. Register via REST API#
You can use the API to automatically register CPEs from an external program. For details, please refer to the API Documentation.
Assigning a CPE to Software Already Registered on a Server#
You can assign a CPE to software that is already registered on a server. This is used for software that is not automatically scanned for vulnerabilities by default, such as software registered using the Windows scanner that is not managed by KB numbers, or software added via the Registration of Software in CSV Format feature.
Especially for Windows, you can use Automatic CPE Assignment to start detecting vulnerabilities with minimal effort.
For details, please see "Assigning CPE/PURL".
Special Cases and Notes#
Scanning Japanese Domestic Software (Using JVN)#
If you want to detect vulnerabilities in Japan-specific products (domestically developed software) for which there is no information in the NVD, check the "Detect vulnerabilities in Japanese software with JVN" box when registering the CPE.
When enabled, this feature references information from JVN, but it will detect all vulnerabilities where the product name matches, regardless of the version. Therefore, please be aware that this increases the likelihood of false positives.
We recommend enabling this check only for Japanese domestic software for which there is no information in NVD, and the information exists only in JVN.
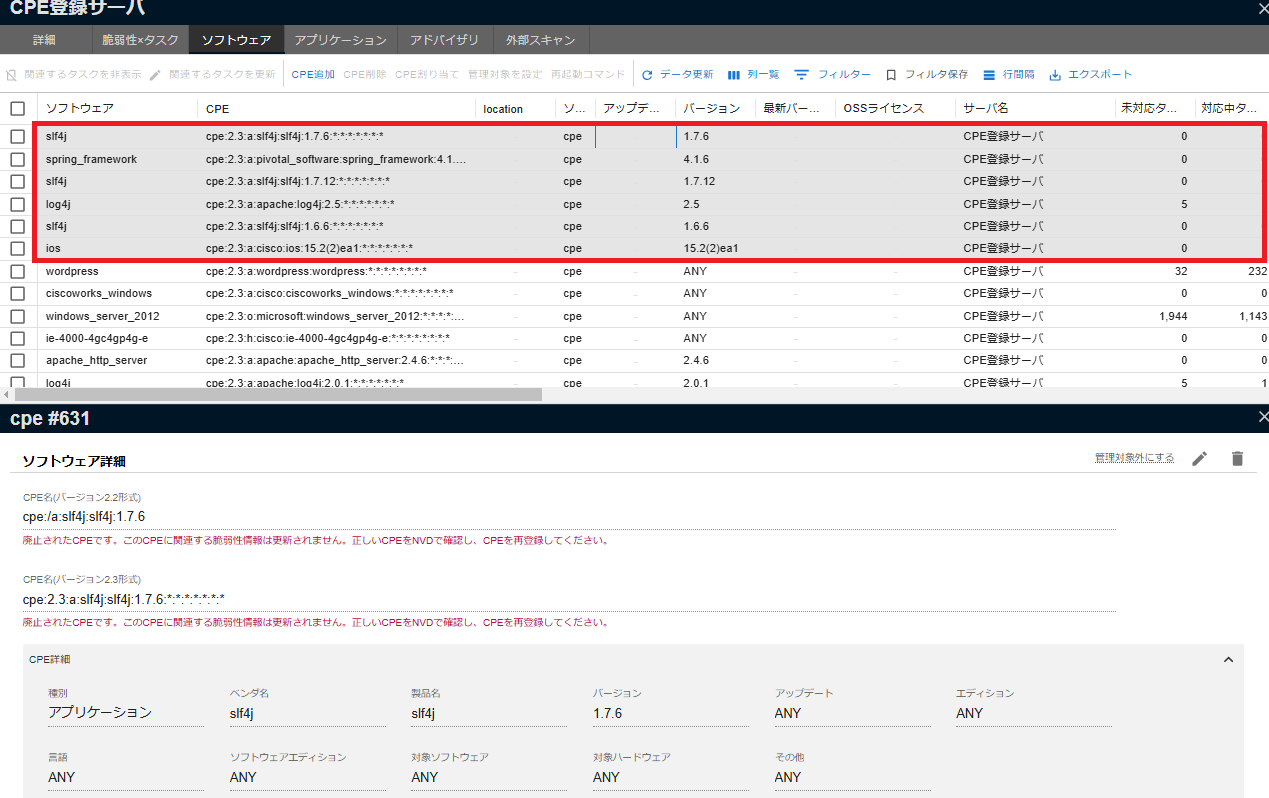
Handling Deprecated CPEs#
If you have registered a "Deprecated CPE" that has been marked as deprecated by NVD, a warning will be displayed on the Software Details screen. With this deprecated CPE, new vulnerabilities will no longer be detected in the future (previously detected vulnerability information will remain). Therefore, please check the correct CPE on the NVD website and update the CPE in FutureVuls. For more details on deprecated CPEs, please refer to "Understanding Vulnerability Detail Pages".
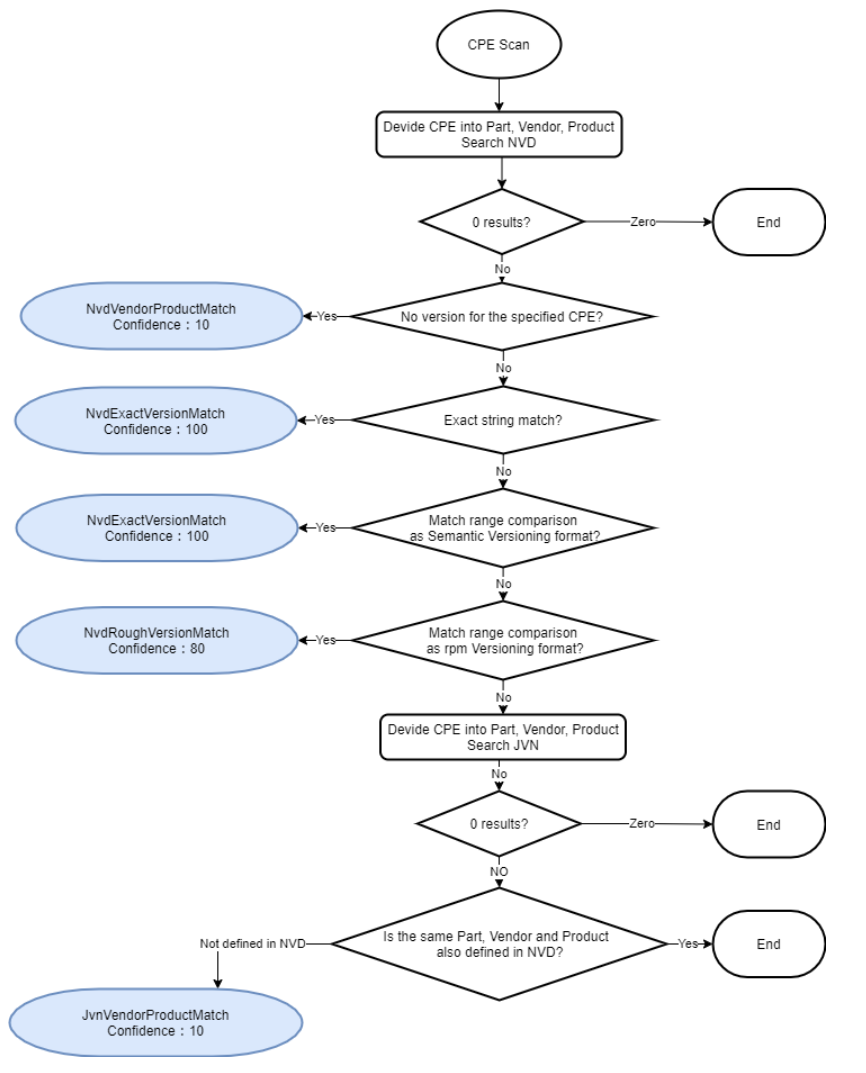
CPE Scan Processing Details#
The detection process for CPE scans is illustrated in the diagram below.