Installing Scanner
This document explains how to scan and upload configuration information to cloud services using Vuls’ Scanner.
There are two types of scanning methods:
- Local Scan to place the scanner on the actual server.
- Remote Scan to scan via an SSH connection.
Refer to the following pages for installation of Local Scan:
Local Scan
You can install the scanner on Linux and Windows by executing the commands displayed. The installation command can be viewed from Group Settings → Scanner.
Only users with group administrator privileges can view the command to install the scanner.
The following are executed during scanner installation (Linux):
- Installation of dependent software
- Creation of a
vuls-saasuser- Creation of a log directory
/var/log/vuls- Placement of FutureVuls scanner in
/opt/vuls-saas- Placement of a config.toml file with localhost scan settings in
/opt/vuls-saas- Configuration of a scan cron job in
/etc/cron.d/vuls-saas-scan(once per day, 5 minutes after the current time)
Additionally, you can also uninstall using the uninstall command on the same screen.
You can confirm the actual processing of the Linux installer with the following command:
curl -s https://installer.vuls.biz/vuls-installer.sh | less
For more information, refer to Local and Remote Scan.
Scanning Method
| Scan Mode | Offline | Description | Details |
|---|---|---|---|
| fast-root | - | Requires root privileges but can obtain information such as whether package restarts are necessary. | OSS Documentation |
| fast | - | Does not require root privileges but cannot obtain some information. | OSS Documentation |
| fast | offline | Does not require root privileges but cannot obtain some information. Depending on the OS, it can be executed offline. | OSS Documentation |
We recommend scanning with fast-root which can obtain useful information for triage such as process startup status. Select the offline mode when the server to be scanned is not connected to the Internet. Please check the above document for supported OSes when using offline mode.
Refer to Changing the Scanning Method for configuration.
Remote Scan Setup (Advanced)
FutureVuls also allows remote scanning like OSS Vuls. After installing the scanner on the scanner management server, you can use ssh to scan other servers on the same network by adding the server settings to config.toml as described in Setting up remote scan.
Remote scan here does not mean scanning over the Internet from FutureVuls. It refers to scanning servers on the same network using ssh from your own management server, which we call remote scanning.
It is also possible to install the scanner on all servers for local scanning or install it on one server and scan multiple servers via ssh.
For details, please refer to Local and Remote Scanning.
Checking the Scanner Version
You can check the scanner version in Server Details.
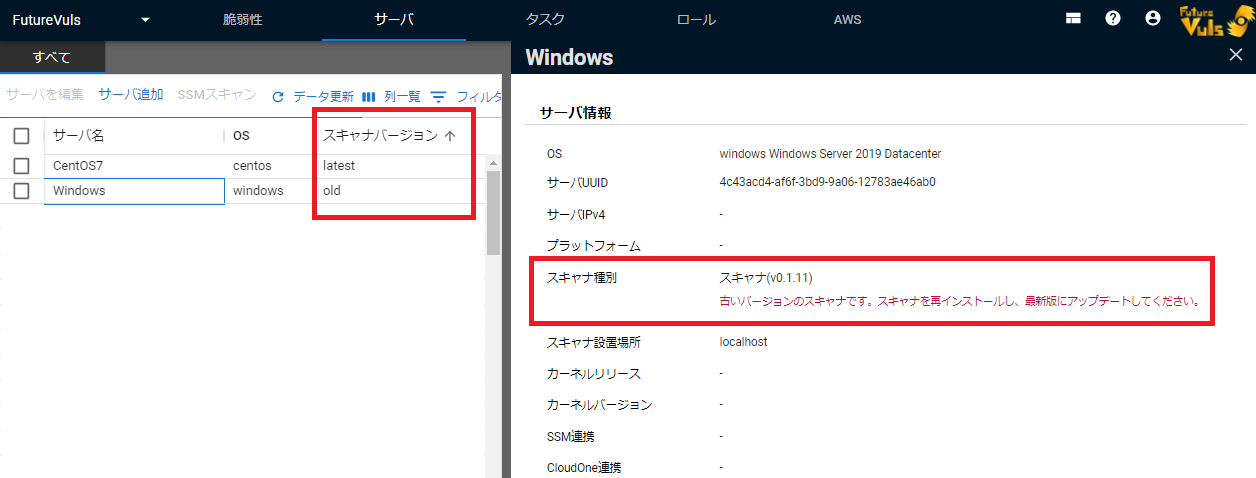
If the scanner is old, you may not be able to use the latest features, so please update it.
The scanner version can also be checked on the server being scanned.
- For Linux
$ whoami
vuls-saas
$ cd /opt/vuls-saas
/opt/vuls-saas
$ ./vuls -v
vuls v0.12.1 build-4f1578b
- For Windows
C:\>cd \Program Files\vuls-saas
C:\Program Files\vuls-saas>vuls.exe -v
2020/11/26 11:50:38 vuls v0.1.9 build-8bfe48a
Scanner Update
For updating Vuls scanner, refer to Updating Scanner.
Notes on Scanning
Server UUID
FutureVuls uses UUID to uniquely identify servers. When running a scan, a unique UUID is issued for each scan server and written to config.toml to identify the server.
If you change the UUID of a server that has been scanned, FutureVuls will recognize it as a different server. This will affect the calculation of fees, so please be careful when changing UUIDs.
Automatic Rewriting of config.toml
At FutureVuls, the config.toml file is automatically rewritten during upload due to the addition of UUID settings.
When rewriting, all comments may be removed, and spaces and order may not be maintained in their original state.
For one generation before, it is saved in the form of config.toml.bk , but settings from before that will be deleted.
The first upload wins in case of simultaneous uploads from the same server
If two uploads from the same server (with the same UUID) are made simultaneously, the first scan result processed will acquire the lock and proceed with the scan, resulting in an error for the later scan result (errors can be confirmed in the scan history).
Although it is a rare case, if you need to scan the same server with the same UUID, please wait a little while before scanning again.
Scan settings via config.toml are basically disabled
In OSS Vuls, scan settings such as CPE settings and excluded package settings can be configured through config.toml, but in FutureVuls, most of the settings configured in config.toml are ignored. Similar settings can be configured on the screen, so please use them to configure the settings.
For other settings that are effective in FutureVuls, please check changing the scan mode and v.
Adding and deleting scanner tokens
Scanner tokens that are included in the command at the time of scanner installation can be added or deleted from Group Settings > Tokens. Create a token with scan permissions from Add Token and select the scanner token during scanner installation.
The method for editing or deleting tokens is the same as token management for developer APIs.