AWS Integration Authentication Settings#
The AWS integration enables the following features in FutureVuls. This guide explains how to configure the AWS authentication settings required to use these features.
- Execute on-demand scans
- Update EC2 instance packages
- Vulnerability scanning for container images
- Vulnerability scanning for instances
- Vulnerability scanning for AWS Lambda
- Import Amazon Inspector SBOM
- EC2 tag integration
Configuring AWS Credentials
Only one AWS credential can be registered per group in FutureVuls.
If you have multiple AWS environments, register them in separate groups.
However, a single AWS account can be registered with multiple groups.
Integration Procedure#
There are two methods for AWS authentication: "Authentication using IAM roles" and "Authentication using API keys." We generally recommend using the IAM role method, which is more secure and easier to set up.
- Authentication using IAM roles (Recommended)
- Authentication using API keys
Granting Permissions to the Executing User
When creating an AWS CloudFormation stack, please grant the following permissions to the user executing the stack creation (or the service role used by CloudFormation).
- The IAM policy described in "Policies Used by FutureVuls"
iam:CreateRoleiam:PutRolePolicy
Additionally, to delete the stack, please grant the following permissions.
iam:DeleteRoleiam:DeleteRolePolicy
Authentication using IAM roles#
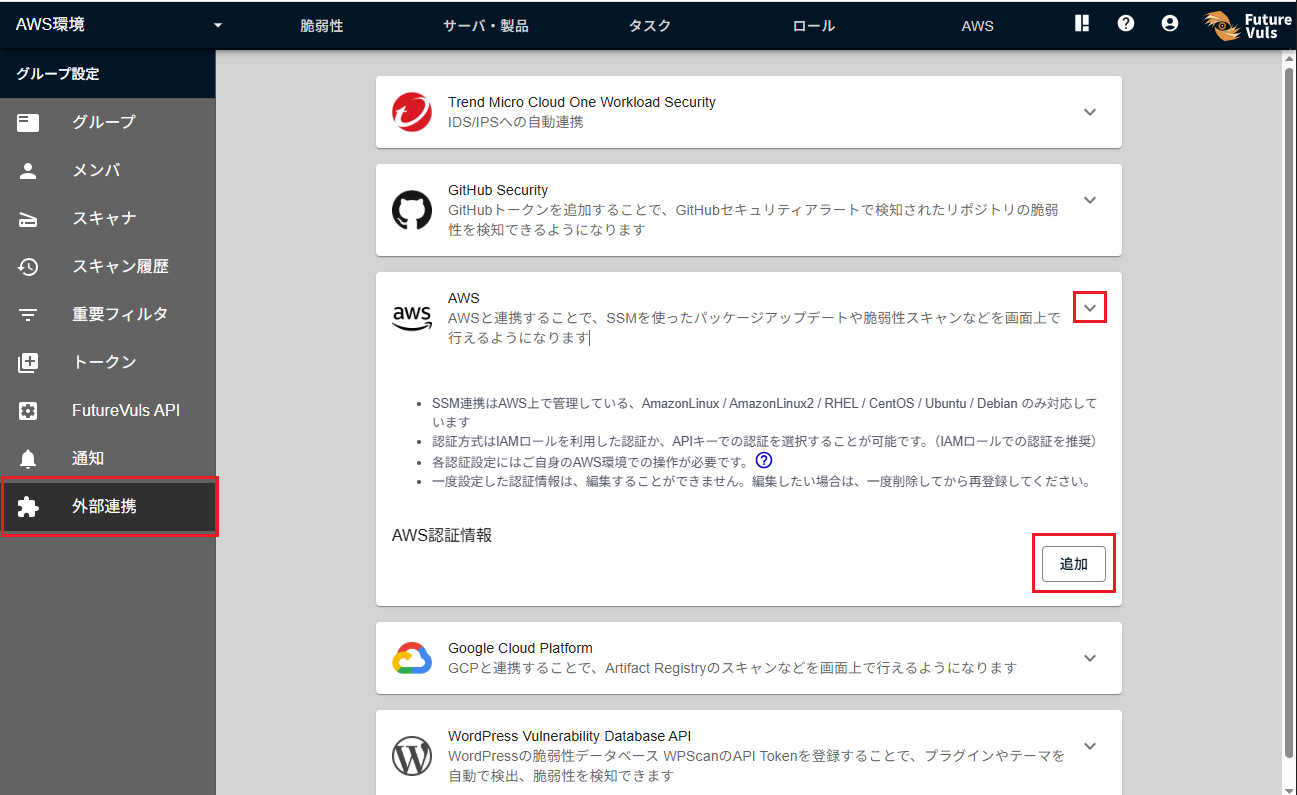
In FutureVuls, navigate to Group Settings > External Integration and click the "Add" button in the AWS section.
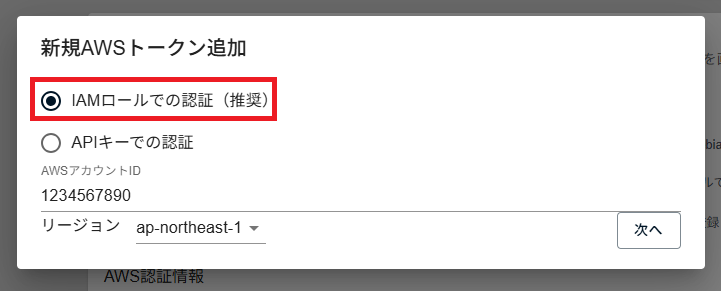
Select "Authentication with IAM Roles (Recommended)," enter the AWS Account ID and Region of the AWS account you want to integrate with, and click the "Next" button.
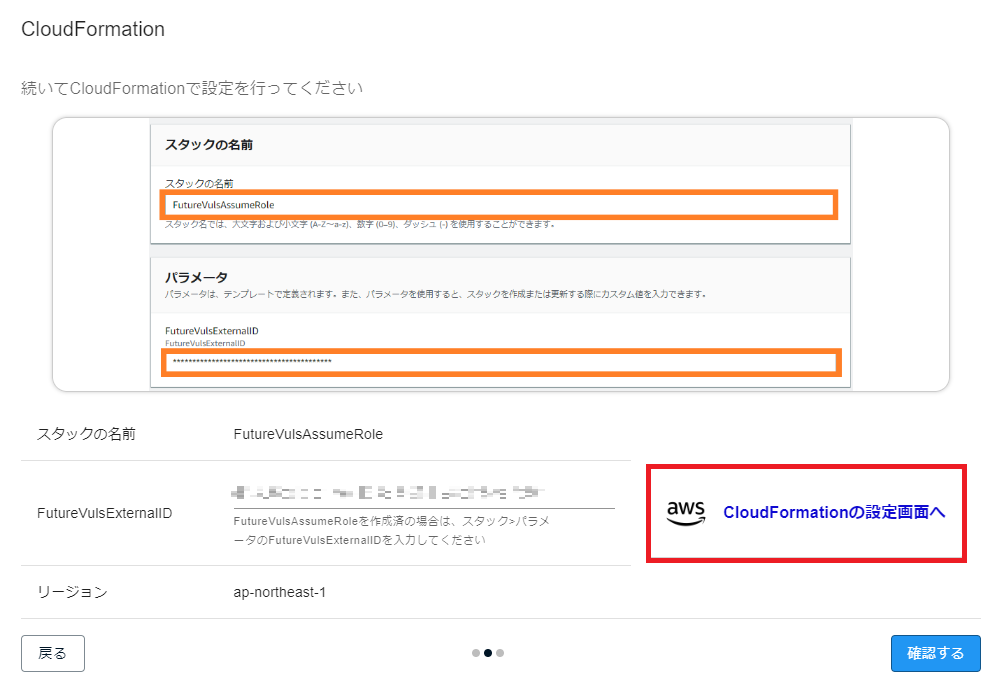
Click the "Go to CloudFormation setup page" button to create a stack from the FutureVuls template using CloudFormation.
After creation, retrieve the value of FutureVulsExternalID from the Parameters tab.
If you have already configured AWS integration for another group
In this case, there is no need to create a new CloudFormation stack. You can reuse the existing configuration.
- Log in to the AWS Management Console and open the
CloudFormationservice page. - From the list of stacks, select the existing
FutureVulsAssumeRolestack. - Select the "Outputs" tab and retrieve the value of
FutureVulsExternalID. - Return to the FutureVuls settings screen, enter the retrieved
FutureVulsExternalID, and click the "Next" button.
After creating the stack, return to the FutureVuls settings screen, enter the retrieved FutureVulsExternalID, and click the "Next" button. If you have already set up AWS integration for another group, you can use the FutureVulsExternalID retrieved from the existing configuration instead.
The system will then verify whether the AWS authentication is valid. If it is valid, the message "AWS Account ID has been registered" will appear.
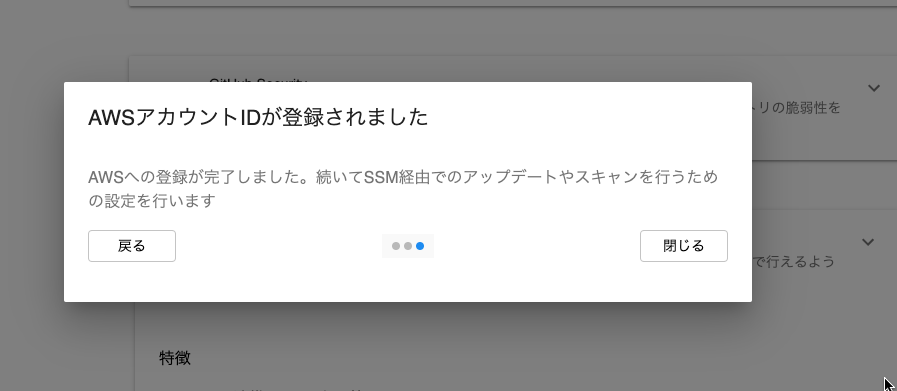
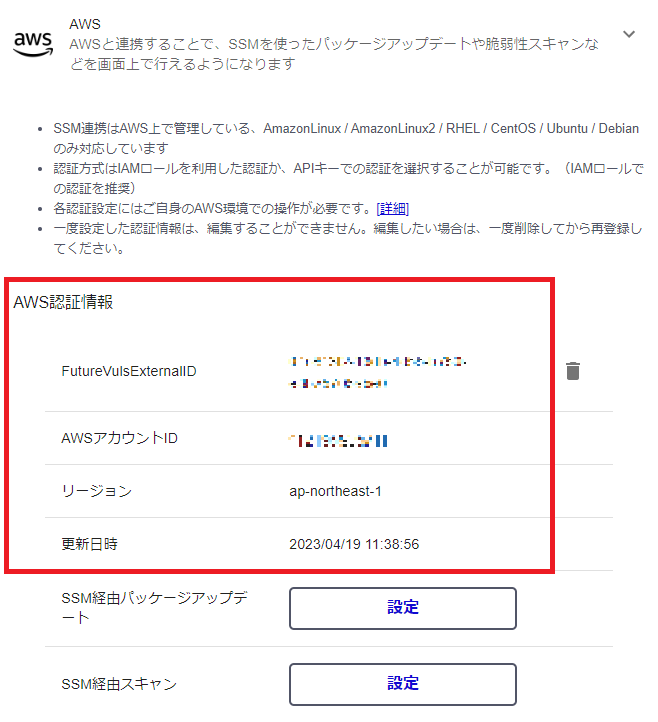
The AWS authentication setup is complete when the credential information is displayed as shown below.
Authentication using API keys#
The API key authentication method is deprecated by AWS due to security concerns. We recommend using the IAM role authentication method described above instead. Use this method only if IAM role authentication is not available in your environment.
The following steps explain how to integrate using an Access Key and Secret Key.
Navigate to the Add AWS Credential screen as you would for the "Authentication using IAM roles" method. Select "Authentication with API Keys" and click the "Go to CloudFormation setup page" button.
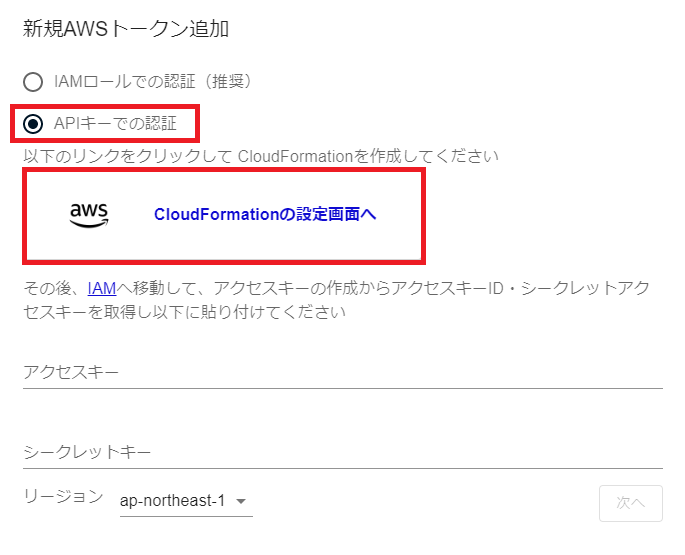
Generate an API key for the created IAM user, enter the Access Key, Secret Key, and Region, and click the "Next" button.
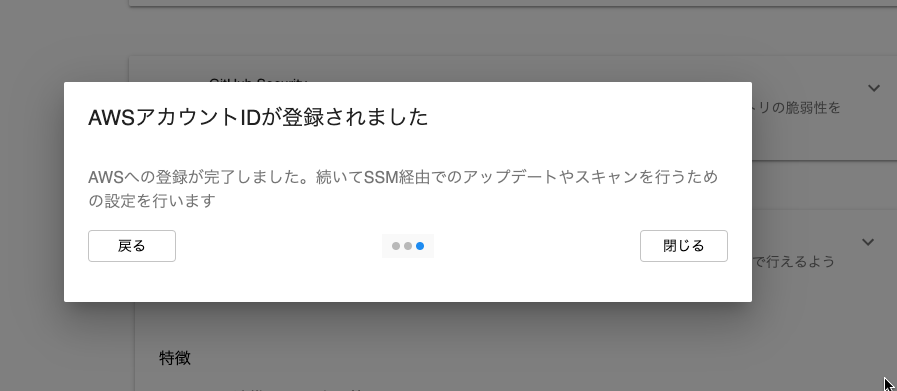
The system will then verify whether the AWS authentication is valid. If it is valid, the message "AWS Account ID has been registered" will appear.
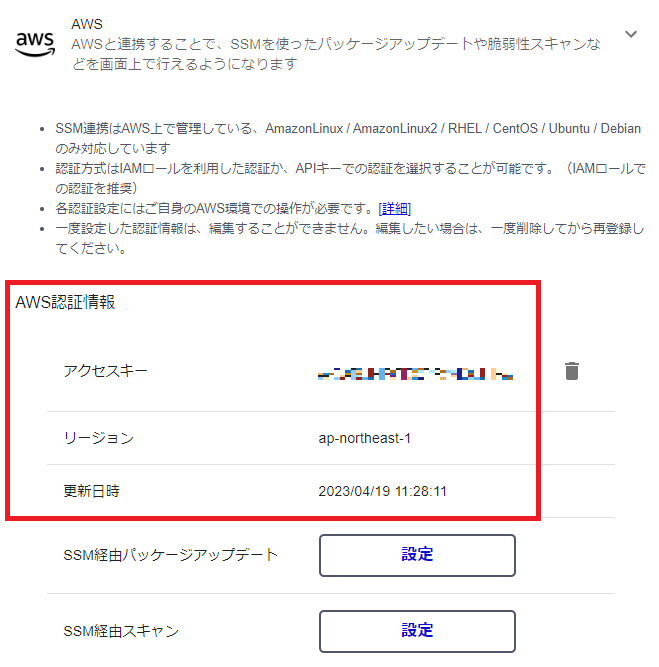
The process is complete when the credential information is displayed as shown below.
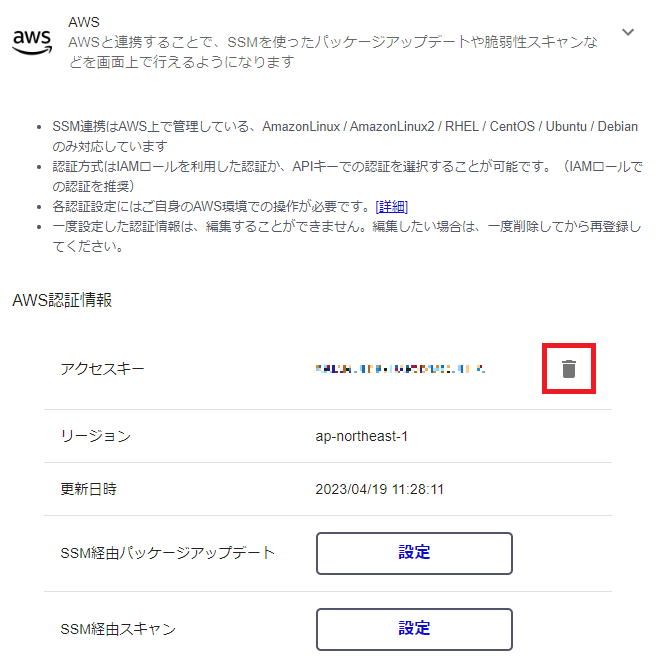
Deleting the Configuration#
Click the delete (trash can) button next to the AWS credential information.
To remove the FutureVuls AWS integration credentials from your AWS environment, delete the FutureVulsAssumeRole CloudFormation stack.
Policies Used by FutureVuls#
The AWS policies used for the FutureVuls AWS integration are as follows. These may be subject to change in the future to support additional integration features.
Basic Policy (FutureVulsAssumeRole)#
This policy is created during the authentication setup.
{
    "Version": "2012-10-17",
    "Statement": [
        {
            "Action": [
                "ec2:DescribeInstances",
                "ec2:DescribeTags",
                "ssm:DescribeInstanceInformation",
                "ssm:ListDocuments",
                "ssm:ListCommandInvocations",
                "ecr:GetAuthorizationToken",
                "ecr:DescribeImages",
                "ecr:BatchGetImage",
                "ecr:DescribeImageScanFindings",
                "ecr:GetRepositoryPolicy",
                "ecr:DescribeRepositories",
                "inspector2:ListFindings",
                "inspector2:ListFindingAggregations",
                "inspector2:ListCoverage",
                "lambda:GetFunction",
                "lambda:ListFunctions"
            ],
            "Resource": "*",
            "Effect": "Allow"
        },
        {
            "Action": [
                "ssm:DescribeDocument",
                "ssm:SendCommand"
            ],
            "Resource": "arn:aws:ssm:*:*:document/FutureVuls*",
            "Effect": "Allow"
        },
        {
            "Action": [
                "ssm:SendCommand"
            ],
            "Resource": "arn:aws:ec2:*:*:instance/*",
            "Effect": "Allow"
        }
    ]
}
Policy for Inspector SBOM Export (Optional)#
This policy is added when using the "Import Amazon Inspector SBOM" feature. It is configured using a separate CloudFormation template.
{
    "Version": "2012-10-17",
    "Statement": [
        {
            "Effect": "Allow",
            "Action": [
                "inspector2:CreateSbomExport",
                "inspector2:GetSbomExport",
                "inspector2:CancelSbomExport",
                "inspector2:BatchGetAccountStatus",
                "inspector2:ListFindings"
            ],
            "Resource": "*"
        },
        {
            "Effect": "Allow",
            "Action": [
                "s3:PutObject",
                "s3:PutObjectAcl",
                "s3:GetBucketLocation"
            ],
            "Resource": [
                "arn:aws:s3:::futurevuls-inspector-sbom-*",
                "arn:aws:s3:::futurevuls-inspector-sbom-*/*"
            ]
        },
        {
            "Effect": "Allow",
            "Action": [
                "kms:Decrypt",
                "kms:Encrypt",
                "kms:GenerateDataKey"
            ],
            "Resource": "arn:aws:kms:*:*:key/*"
        }
    ]
}