Registering Server Information#
This section explains the procedure for registering server information in FutureVuls.
Navigate to the Servers tab and click the "Add Server" button.
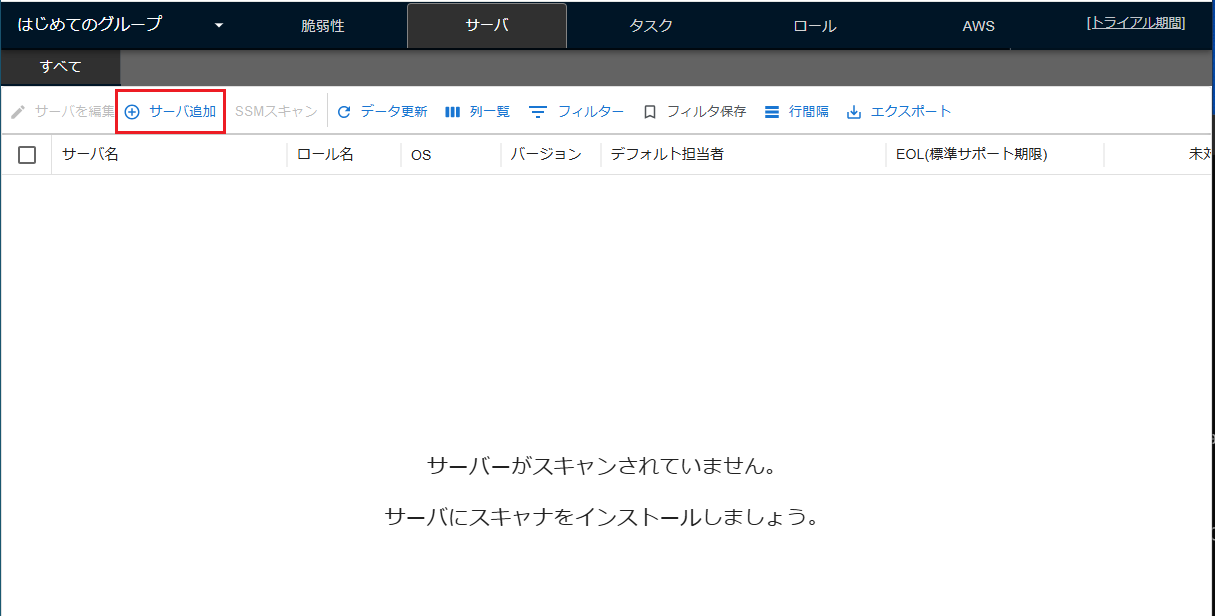
FutureVuls allows you to register various targets (physical servers, containers, libraries, etc.). For details, please refer to the "Supported Environments manual".
Below, we explain how to register server configuration information, using two typical scan patterns as examples: "Local Scan (Server OS Scan)" and "Paste Scan (Add Paste Server)".
Server OS Scan#
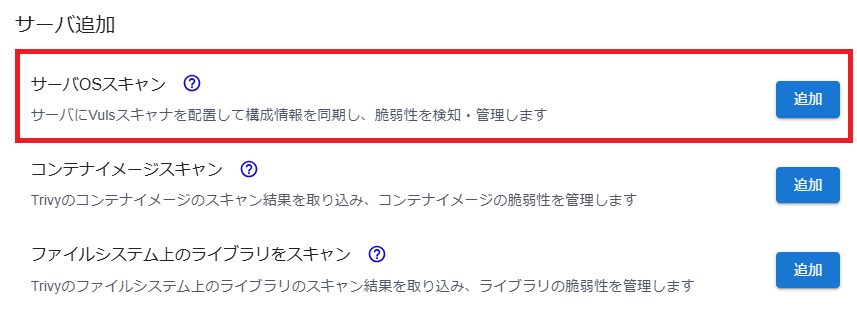
If the server to be scanned is on hand and can connect to the internet, select "Server OS Scan".
You can install the scanner by running the displayed command on each target server with administrator privileges. The commands differ for Linux and Windows OS, so please select the appropriate one.
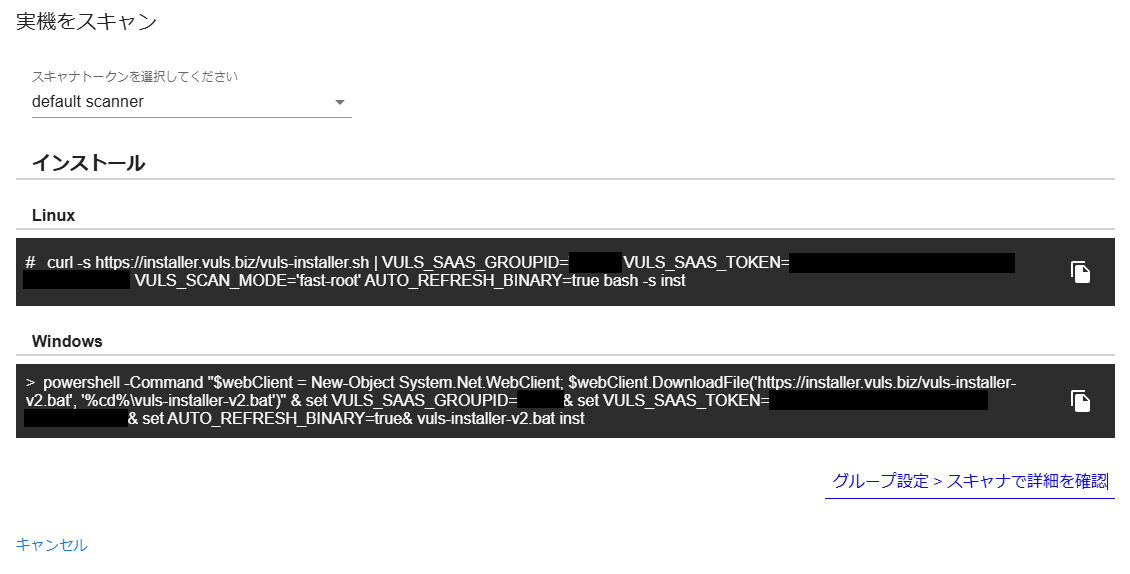
When the above command is executed, the following processes are performed on the server. After about 5 minutes, the server's configuration information will be sent to FutureVuls, and the vulnerability detection process will run automatically. For details on the settings configured during the scanner installation, please refer to the "Installation manual".
- Installation of the FutureVuls scanner
- Creation of the
vuls-saasuser and group to run scans and other tasks - Configuration of scheduled tasks (cron, Task Scheduler) (set to run 5 minutes after installation)
Add Server via Paste#
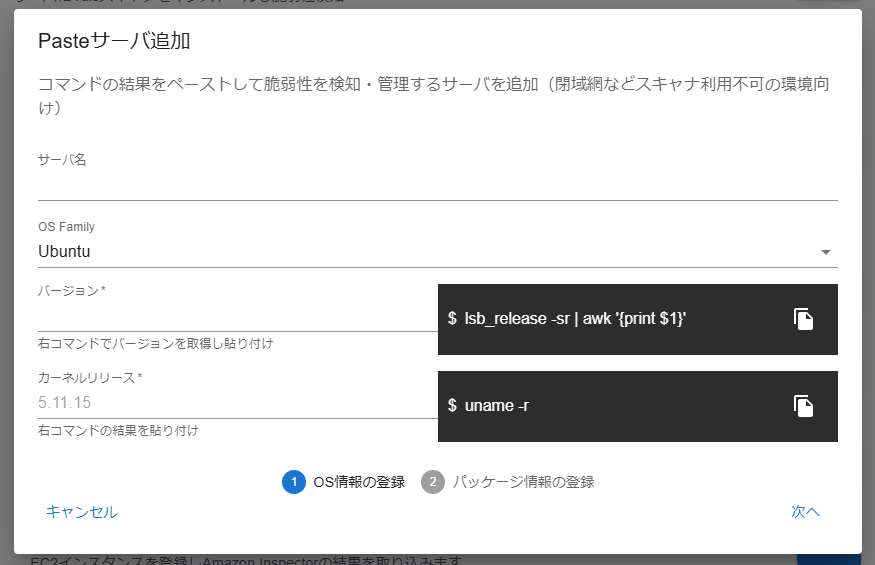
Select this option if the target server is on a closed network and not connected to the internet, or if you cannot install a scanner on the server. After selecting the server's OS, follow the on-screen instructions to run the commands and paste the results.
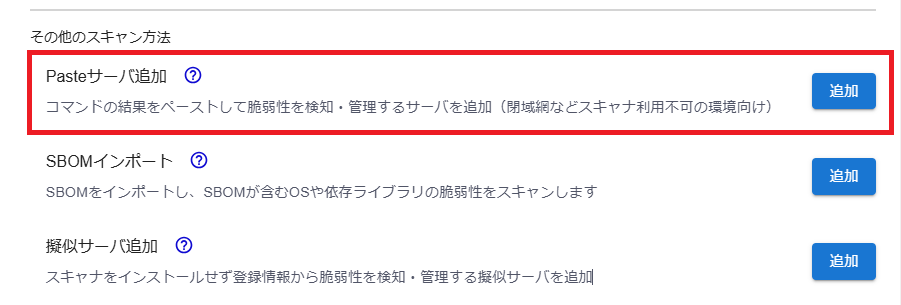
Enter the name of the server you want to manage and select the OS. The commands to execute differ depending on the OS, so run the "Version" and "Kernel Release" commands shown on-screen on each server, enter the results, and click "Next".
Execute the command to retrieve the server's configuration information. Run the command shown on-screen on your server, paste the entire result, and click "Submit".
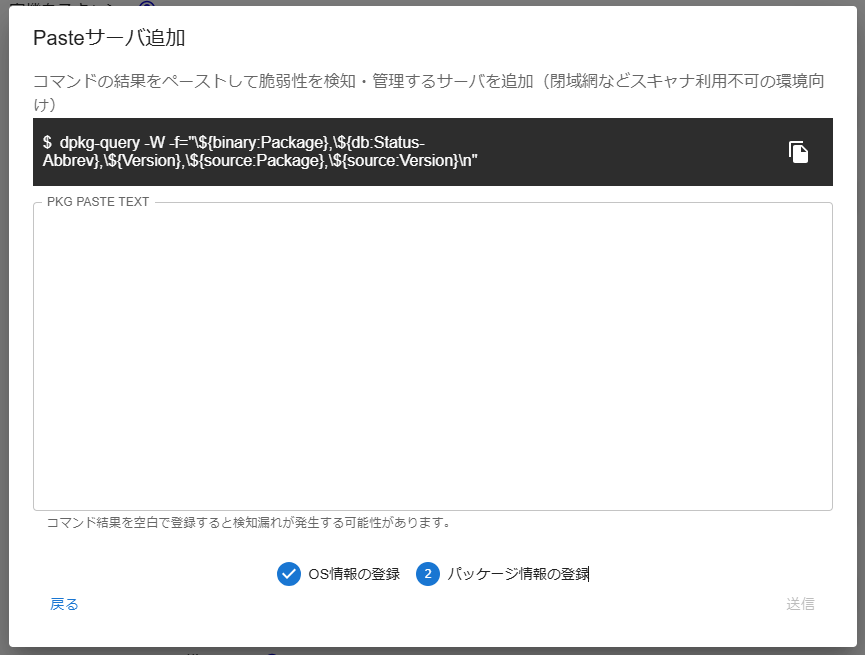
After submission, the configuration information will be registered in FutureVuls. Based on this registered configuration information, the vulnerability detection process will run automatically.
Sample Data for Paste Scan#
If you are unable to prepare a test environment, you can also use the sample data provided below.
| Item | Value |
|---|---|
| OS Family | Amazon Linux |
| Version | 2 |
| Kernel Release | 5.11.15 |
| Command Result | curl 0 7.76.1 4.amzn2.0.1 x86_64 @amzn2-core glibc 0 2.26 48.amzn2 x86_64 @amzn2-core |
Once the server is registered, the next step is to review the server information in FutureVuls (→Checking Server Information).