Package Updates via SSM Integration#
By configuring FutureVuls integration, you can update EC2 packages via SSM (AWS Systems Manager). You can perform updates per task from the FutureVuls console.
Applicable Environments
This feature is only available for servers registered in FutureVuls through "Vuls Scan".
For supported operating systems, please refer to "Supported Environments".
Update Configuration#
Complete the "AWS Authentication Settings" in advance.
Configuration for AWS EC2 Instances#
This operation must be performed for each EC2 instance you wish to integrate with SSM.
Create and Attach a Role#
- Create an IAM role with the
AmazonSSMManagedInstanceCorepolicy attached. (Reference) - Attach this IAM role to the target EC2 instance.
Configure and Register the SSM Agent#
Install the SSM agent appropriate for your AWS environment. (e.g., sudo yum -y install amazon-ssm-agent for Amazon Linux). (Reference)
Confirm SSM Registration#
Verify that the instance is registered under Systems Manager > Fleet Manager > Managed nodes in your AWS console.
Configuration for the AWS Account#
This configuration is required for the AWS account where the EC2 instances to be integrated with SSM are located.
Check if FutureVuls Integration is Already Configured#
If the configuration has already been completed for another group's SSM integration, you can reuse the existing configuration.
In the FutureVuls console, navigate to Group Settings > External Integration > AWS and click the "Configure" button for Package updates with SSM.
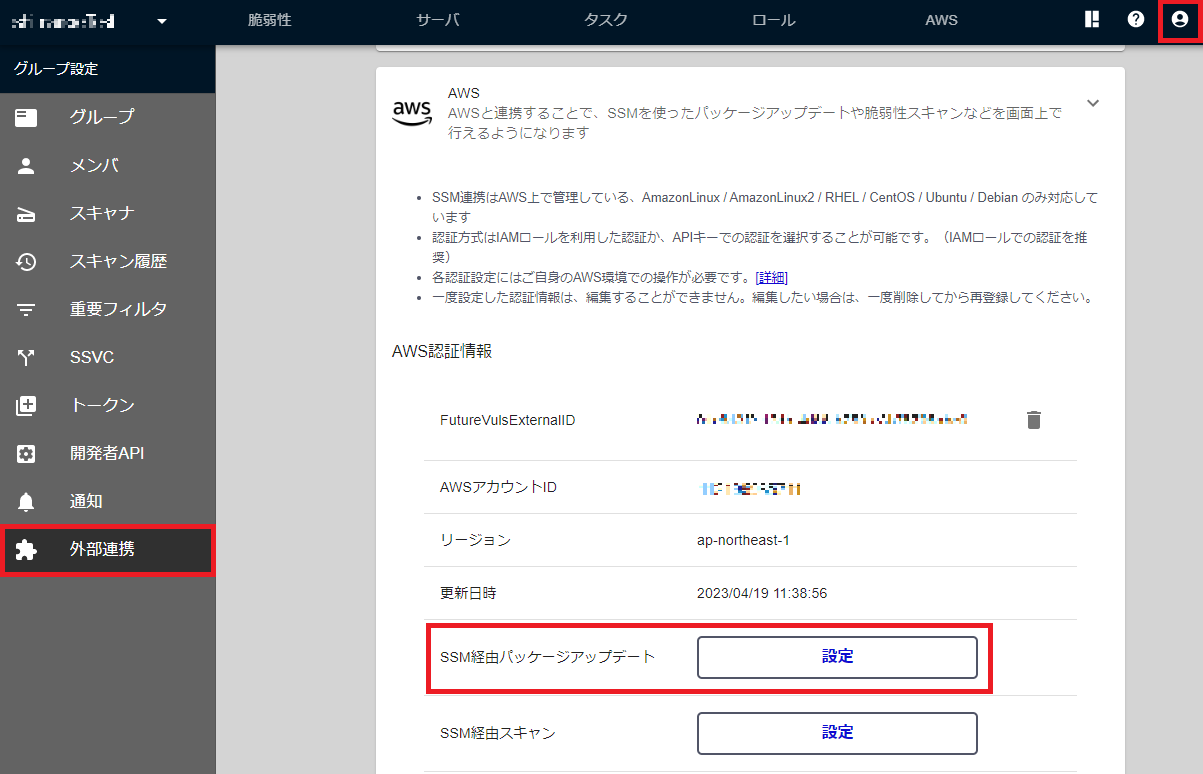
Ignore the command shown and click the "Next" button.
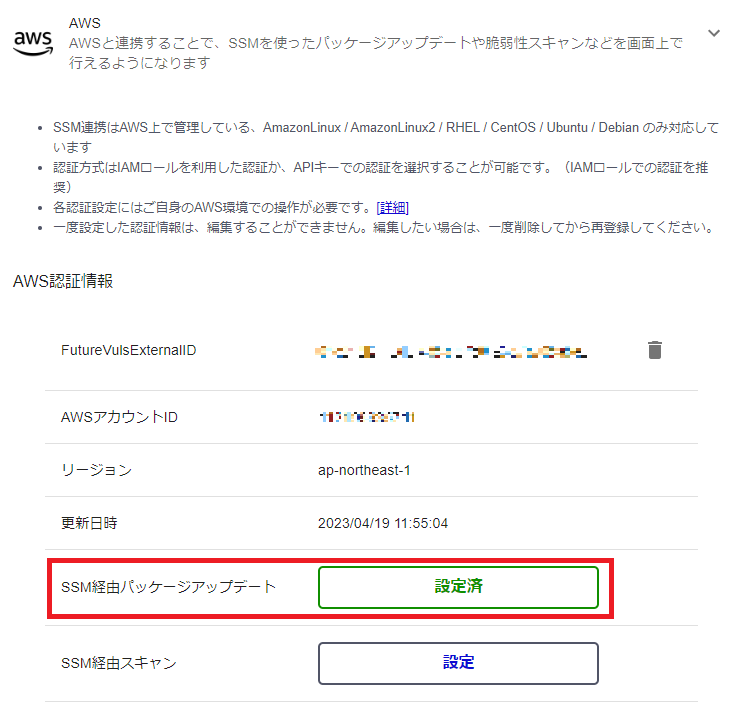
If Package updates with SSM shows "Configured", the setup is complete. If an error appears, follow the steps below.
Prepare the Environment to Create the SSM Document#
To allow FutureVuls to update OS packages on EC2 instances using SSM, first prepare an environment where you can create the SSM document.
- Install the AWS CLI in your preferred environment, following the "Help".
- In that environment, ensure you can execute the
createDocumentanddeleteDocumentactions.- Sign in to the target AWS account as a user with permissions for these actions. (Reference)
- Alternatively, attach a policy with these permissions to an EC2 instance within the target AWS account.
Create the SSM Document#
In the FutureVuls console, navigate to Group Settings > External Integration > AWS and click the "Configure" button for Package updates with SSM.
Run the command shown in the environment you prepared above.
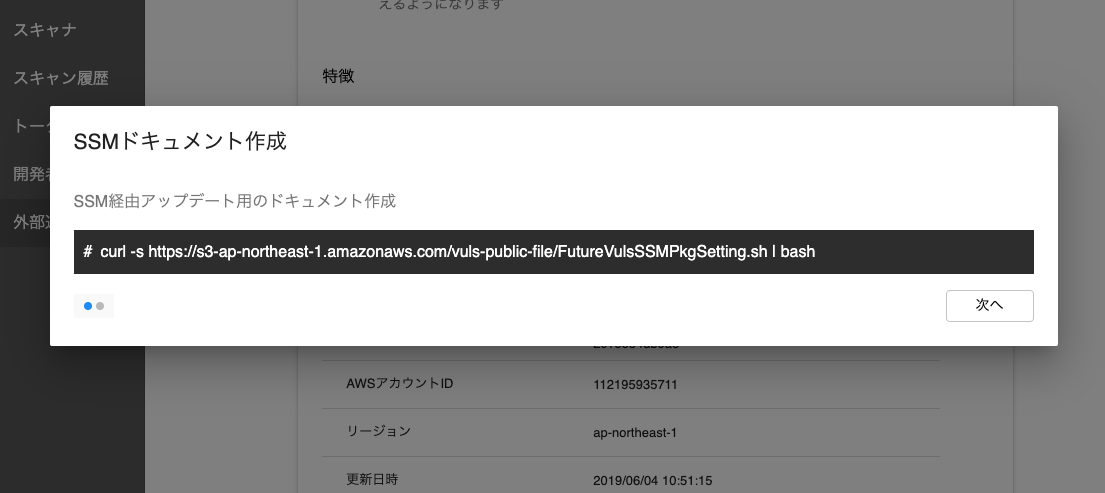
After execution, click the "Next" button. If Package updates with SSM shows "Configured", the setup is complete.
Automatic Integration with SSM#
After completing the SSM integration settings above, the scanner will check each server's eligibility for SSM integration and import the results into FutureVuls.
The configuration is complete when the SSM Integration column in the server list shows a ✓ as follows.
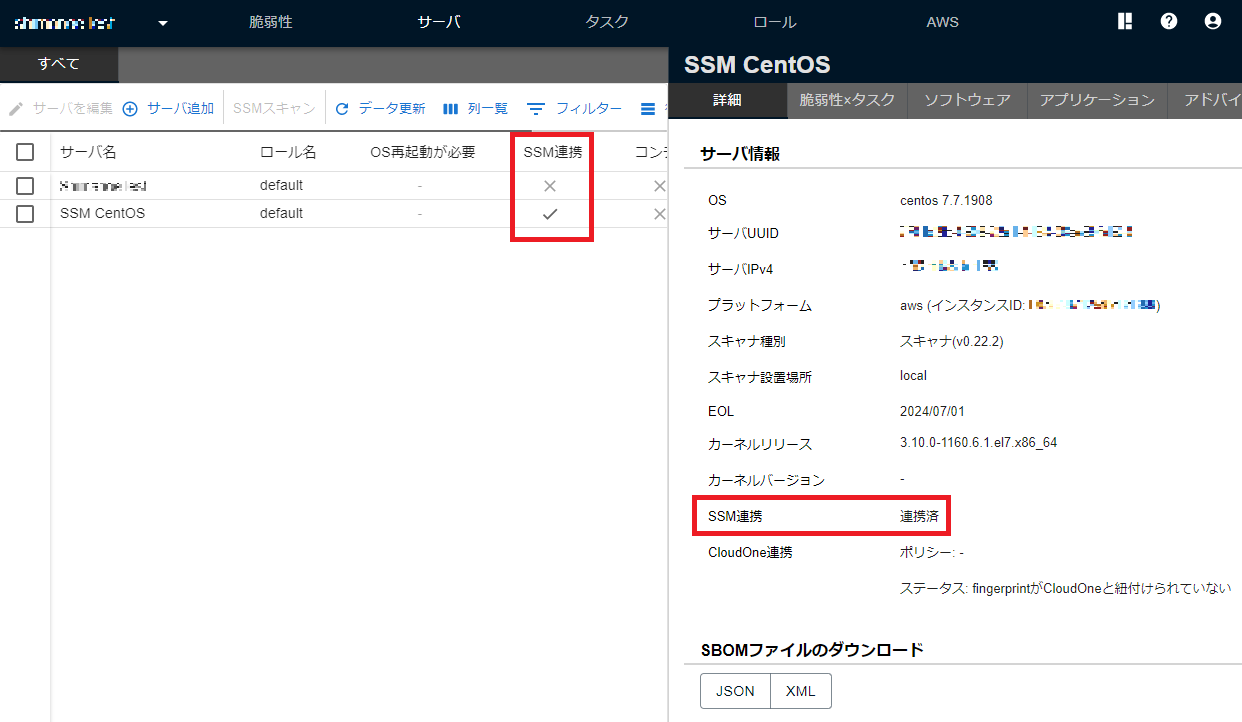
If you add a new server to be managed by SSM after configuring the AWS integration, it will be automatically integrated with FutureVuls during the next scan.
Performing Updates#
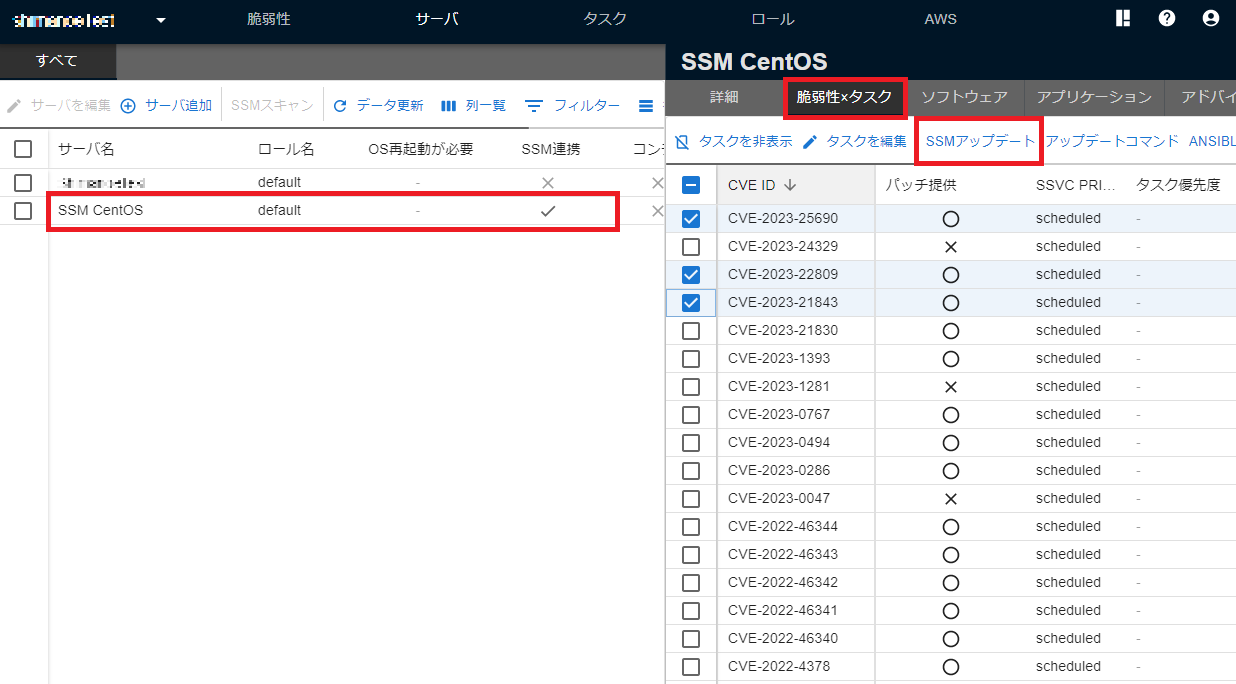
From the Task tab or Server tab > CVE × Task tab, select the task whose packages you want to update and click the "SSM Update" button.
Confirm the target server, packages, and the command that will be executed.
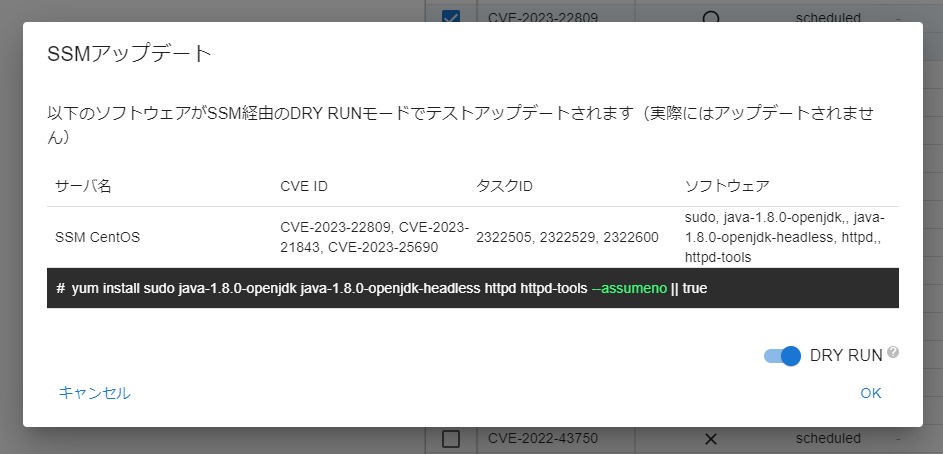
- Clicking the "OK" button in
DRY RUNmode will execute a test update. The results can be checked from theAWS tab > SSM Command History. - The execution history and status of SSM commands can be checked from the
AWS tab > SSM Command History. -
The status types for SSM package updates are as follows:
- RUNNING: The test update is in progress.
- READY: Dependency resolution succeeded, and the actual update is ready to run.
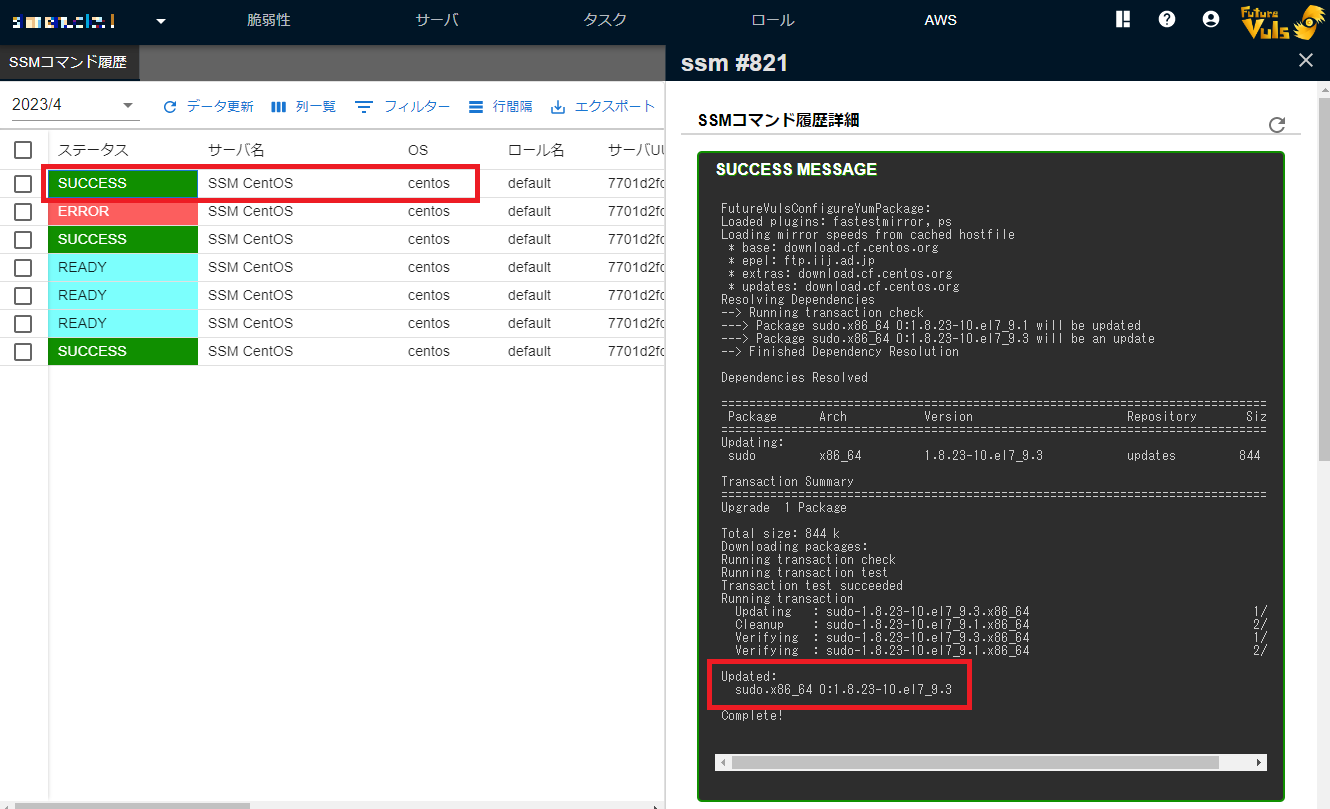
- SUCCESS: The update has been successfully completed.
- ERROR: The test update or other processes have failed.
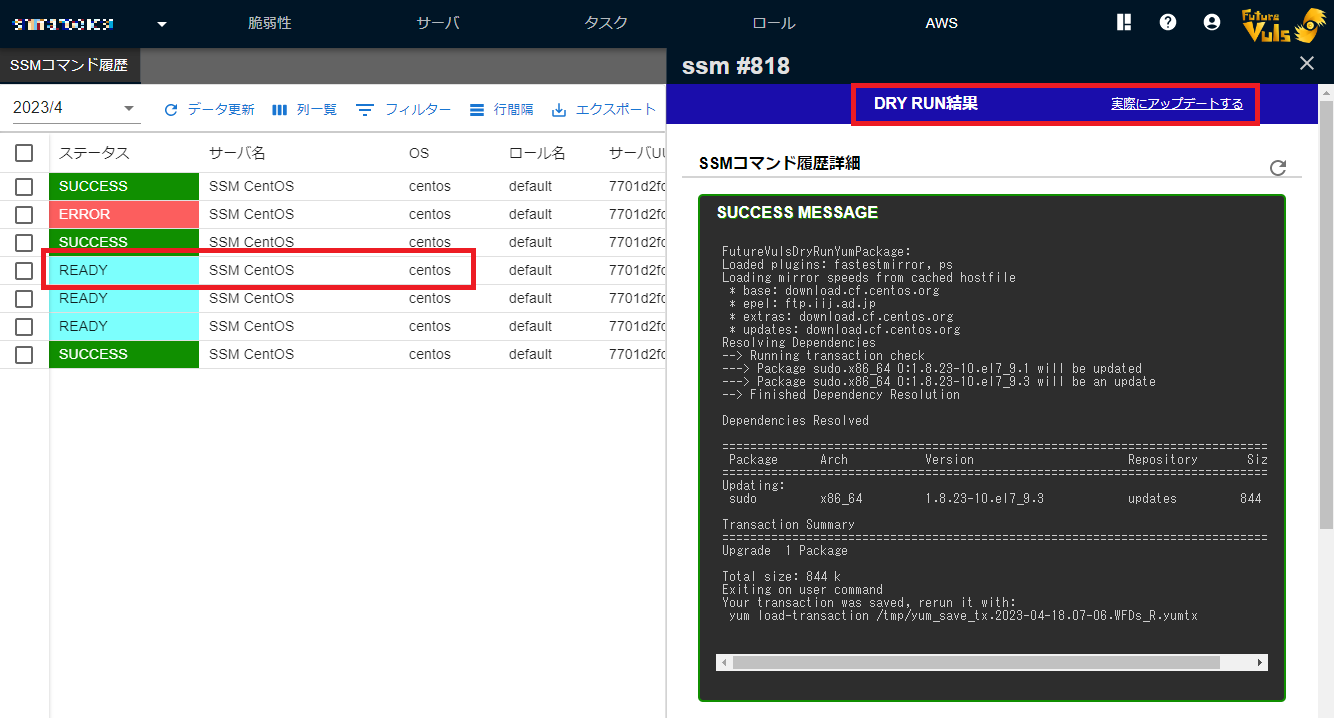
For tasks showing READY status after a dry run, you can perform the actual update from the test execution results screen.
Running the update issues a new SSM command, and if it succeeds, the status changes to SUCCESS.
If an Update Fails#
If an ERROR MESSAGE like the following appears in the SSM command history details, follow the steps below to check the results.

- How to investigate the cause of the error
- Log in to the target AWS account and navigate to
AWS Systems Manager > Run Command > Command history. - Search for the
Command IDon the command history screen.
- Log in to the target AWS account and navigate to