Preview
This guide is a preview. Its content may change.
Setup 1: Structure Your Account#
For Everyone
Before you register servers, create the "groups" that will hold them and invite the people who will use FutureVuls as members. Here, you apply in the console what you decided in Planning 2: Decide Your Team and Visibility.
This page is the first task of the "rollout" phase, which you complete by week 4 after signing your contract (ramp-up milestones).
The Three Units#
| Unit | Role | Example |
|---|---|---|
| Organization | The unit of your contract. There is one for your entire company, and it centrally manages members, permissions, and overall settings | Sample Corporation |
| Group | The unit of daily operations. Server registration, vulnerability detection, and task handling are all done per group. What each user can see is also separated by group | IT Systems, Production Management, Public Web |
| Group set | A unit that aggregates multiple groups. It lets you track response status across the company or across departments | View all production systems together, view all public-facing servers together |
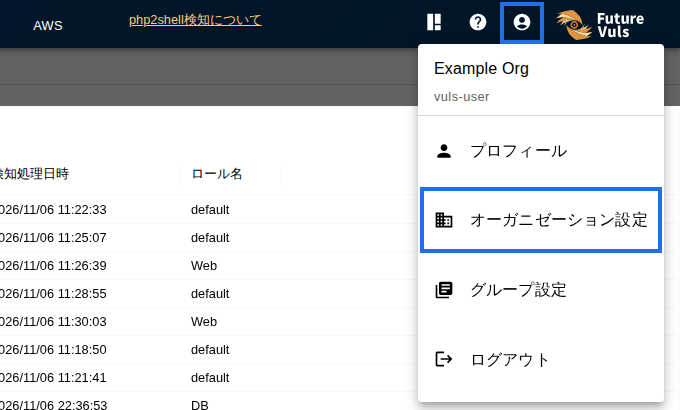
To see the groups and group sets in your organization, click the account icon in the upper right of the screen and open "Organization Settings".

Steps#
1. Create a Group#
Create groups based on the structure you decided in Planning 2: Decide Your Team and Visibility. If you followed the Quick Start, you already have one group.
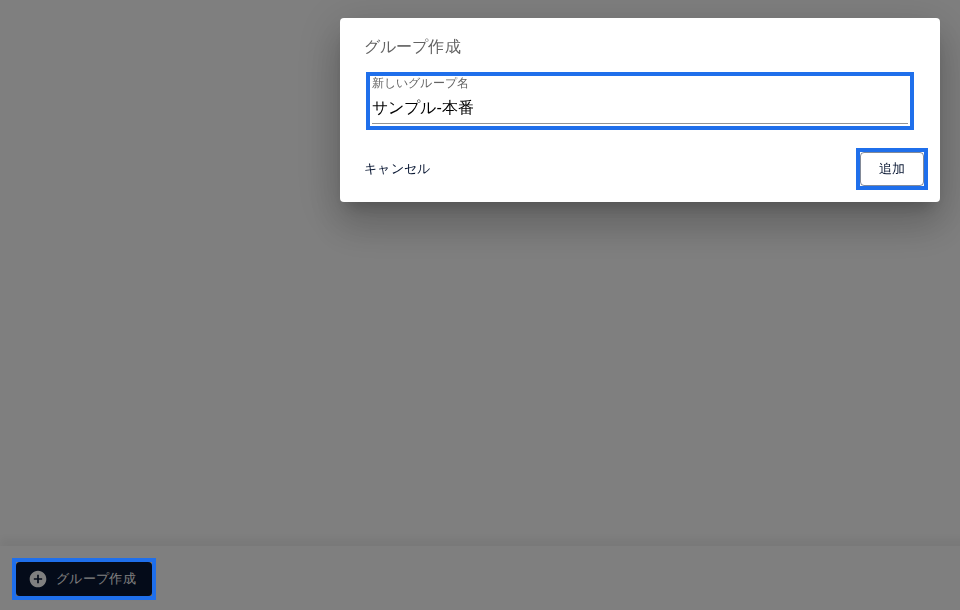
Click the user icon in the upper right of the screen, open "Organization Settings > Group", and click "Create a group" below the group list. Enter a group name and click "Add" to finish (you can change the name later). For step-by-step instructions with screenshots, see Create a Group.
2. Invite Members#
Invite the people involved in operations as members of the group. Give group administrator permissions to the technical staff who will install scanners on servers. This is because the scanner installation command is shown only to users with group administrator permissions.
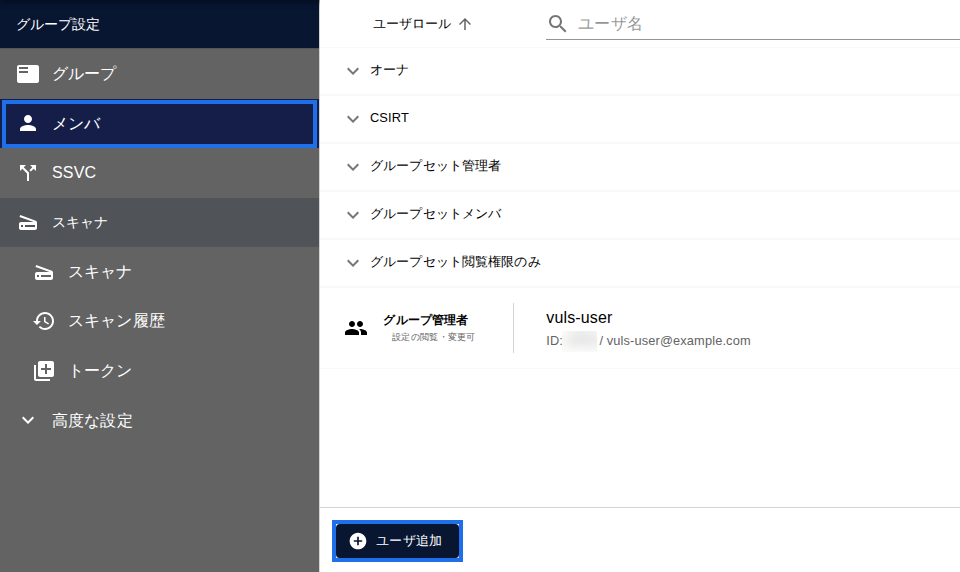
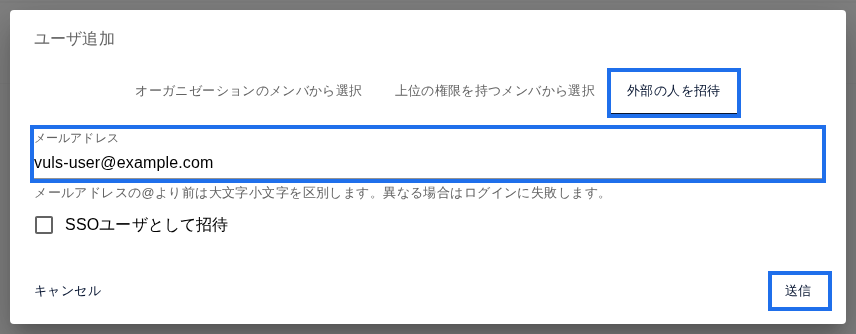
For the types of permissions and how they differ, see User Permission Management. To add members, click "Add User" under "Members" in Group Settings, enter the email address on the "Invite an external user" tab, and click "Submit". You don't choose a permission on this screen; change the permission in the member list after adding the user. To add someone to the whole organization, use "Add User" under "Members" in Organization Settings. An email with a temporary password is sent to the email address you added (Adding a User).
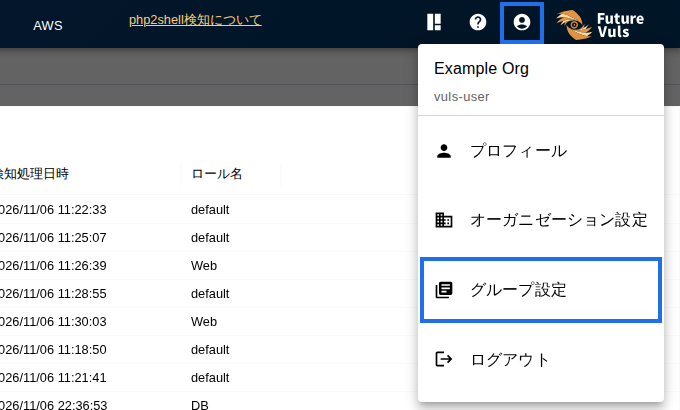
To open Group Settings, click the account icon in the upper right of the screen and select "Group Settings".
3. Set the Group's Default Assignee#
Before you register servers, decide on the group's default assignee. For servers registered with a scanner or the API, this default assignee is set as the server's assignee, and tasks for vulnerabilities found on that server are assigned automatically. Initially, the person who created the group is the default assignee.
In "Default Assignee" in Group Settings, select the person you decided on in Planning 2: Decide Your Team and Visibility under "who to ask to handle fixes." Changing the group's default assignee later does not change the assignee of servers that are already registered. Deciding before you register servers saves you the work of fixing them later (Group Settings).
4. Create a Group Set If Needed#
If you want to view the status of multiple groups together, create a group set and add the groups to it. While you have only one group, you don't need to create one.
Group sets are a CSIRT plan feature. For how to create one, see Group Sets.
Common Issues#
| Symptom or question | Cause and solution |
|---|---|
| I re-invited a user I had removed from a group, but the temporary password email didn't arrive | Because the user's information still exists, no new temporary password is sent. The user joins as soon as they are added, so the invited user can log in with their existing password. If the user has forgotten their password, reset it from "Forgot your password?" on the login screen ("After removing a user from a group and inviting them again, the temporary password email is not sent…") |
| I want to set up multi-factor authentication (MFA), or require it for everyone | You can set up two-factor authentication at login. You can also require it for all users in the organization ("Setting Up Multi-Factor Authentication") |
| I'm having trouble setting my password | See "Having trouble setting your password" |
| I can't find where the API token is | See "I can't find where the API token is" |
A user can belong to multiple groups within the same organization, but can belong to only one organization. If you are registered in multiple organizations with the same email address, you choose which organization to use when you log in (Organization / Group). Removing a user from a group does not remove the user's information or their membership in other groups.
Troubleshooting#
- Not sure about permissions or login settings: Permissions, Roles, and Login Settings
- Not sure about group or organization settings: Group and Organization Settings
If that doesn't solve the problem, contact us through the support contact form.
Learn More#
Next Page#
Register servers in your group. Go to Setup 2: Register Servers and Products.