Preview
This guide is a preview. Its content may change.
Register with Local Scan#
Read Only the Method You Use
With this method, you install a small program (a scanner) on your server, and it automatically checks "what is installed" once a day. If your server can connect to the internet, we recommend starting with this method.
How Local Scan Works#
flowchart LR
    A["Your server<br>Scanner (runs automatically once a day)"] -->|"Sends configuration information"| B["FutureVuls<br>Vulnerability assessment"]
    B --> C["Check the results in your browser"]
How it works in detail (you can follow the steps without reading this)
The scanner collects the list of OS packages and running processes and sends them to FutureVuls. On Linux, it matches them against the security information published by the distribution and also takes backports (updates that bring in only the fixes while keeping the older version) into account, which enables highly accurate detection. On Windows, it determines the application status of updates (KBs) based on Microsoft's update information. It can connect to Windows Update either in environments with direct internet access or under WSUS management. Vulnerability assessment is performed on the FutureVuls side. The scanner on your server only collects information. However, on RHEL, Amazon Linux, and similar OSes, collecting the information can use around 1 GB of memory. On those OSes, check the required amount of memory in advance (requirements during scan execution). The scanner is a FutureVuls-specific program based on the OSS "Vuls", and its source code and processing details are publicly available.
What to Check Before Registering#
| What to check | Details |
|---|---|
| Is the target OS supported? | RHEL, Ubuntu, Amazon Linux, Debian, Oracle Linux, Windows Server, and others. For details, see Supported Environments |
| Can the server connect to the internet? | This is used to download the installer and to send results every day. The required destinations are listed in Service Connectivity Requirements |
| Do you go through a proxy? | Behind a proxy, the scanner needs proxy settings. For the steps, see Proxy Configuration |
| Can you run it with root privileges (administrator privileges on Windows)? | These are needed because the installation creates a user for running the scanner and sets up scheduled execution |
| Do you have group administrator privileges in FutureVuls? | The installation command is displayed only to users with group administrator privileges. If it isn't displayed, ask a group administrator to grant you the privileges or to share the command |
Steps#
1. Copy the Installation Command#
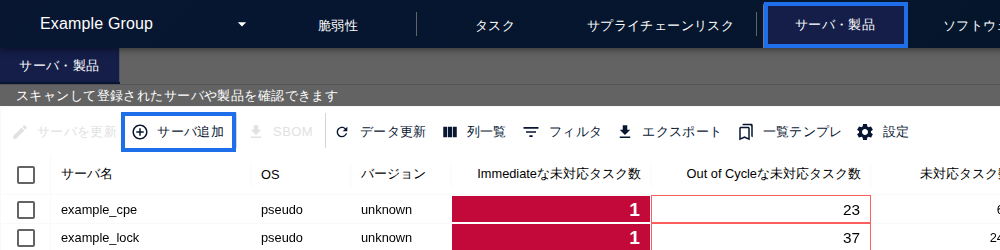
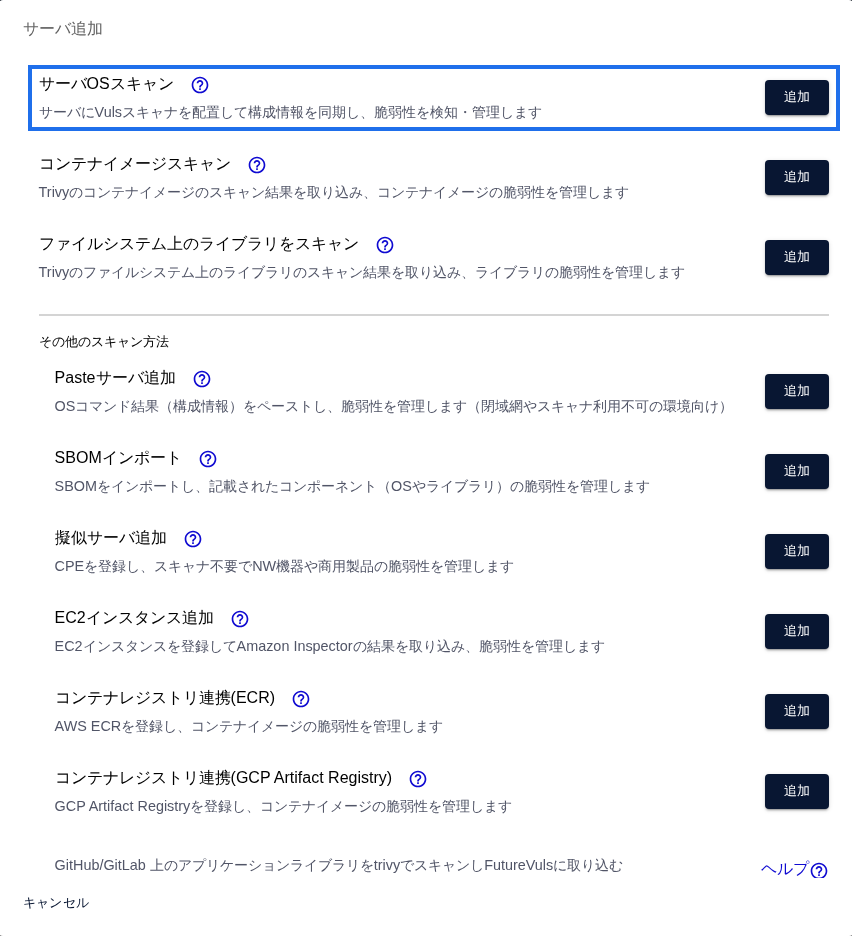
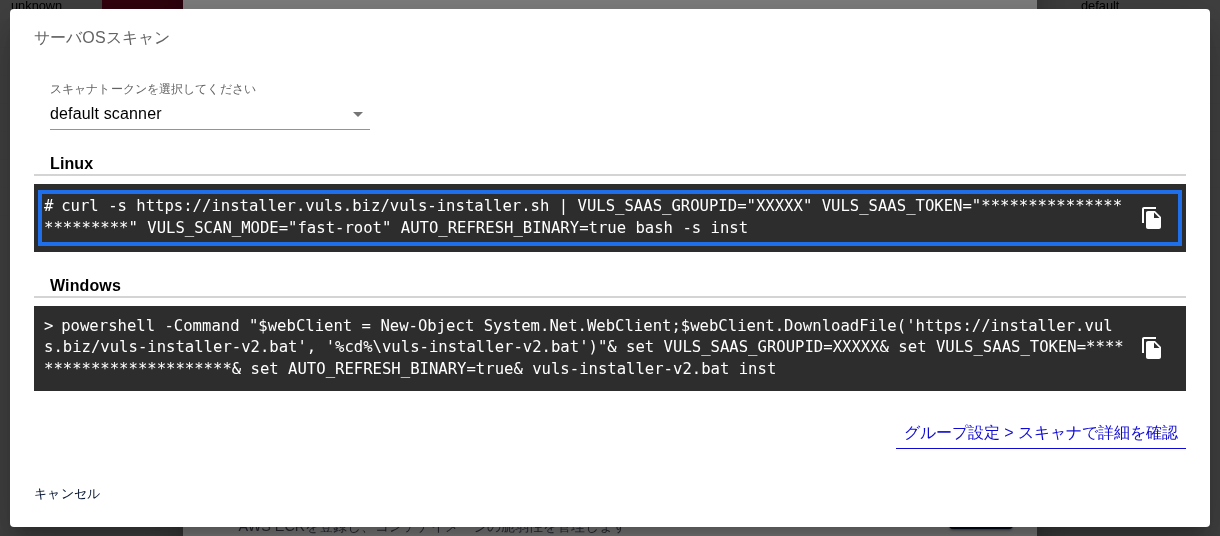
On the Server / Product tab, click "Add Server", and then click "Add" for "Server OS Scan". Copy the command for your OS.
The command contains information specific to your group (the group ID and token). Be sure to copy it from your own screen.
2. Run the Command on the Server#
Log in as root, paste the copied command, and run it. You won't be asked for a password.
Run it in a Command Prompt started as an administrator.
How to tell it succeeded
It finishes in a few tens of seconds. If the last line shows [END ] Install scanner finish., the installation succeeded.
root@scan:~# curl -s https://installer.vuls.biz/vuls-installer.sh | \
VULS_SAAS_GROUPID='(your group ID)' VULS_SAAS_TOKEN='(your token)' \
VULS_SCAN_MODE='fast-root' AUTO_REFRESH_BINARY=true bash -s inst
[START ] Install scanner.
[SUCCESS] Check root user.
[SUCCESS] Check distribution. [OS: ubuntu]
[SUCCESS] Create user and group. [user: vuls-saas]
[SUCCESS] Download binary. [/opt/vuls-saas/vuls]
[SUCCESS] Create config. [/opt/vuls-saas/config.toml]
[SUCCESS] Create cron. [/etc/cron.d/vuls-saas-scan]
[END ] Install scanner finish.
The above is an example of the output. Always copy the actual command from the screen.
3. Check the Results on the Screen#
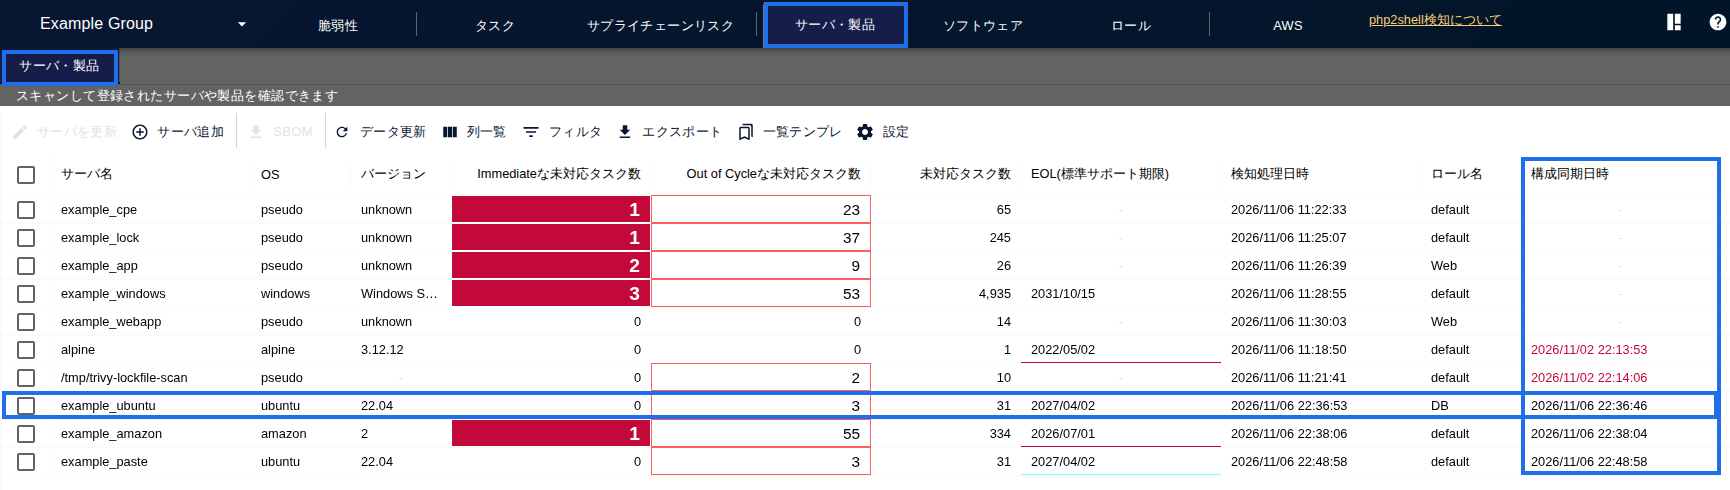
After about 5 minutes, a new row appears in the server list.
How to tell it succeeded
Click the row and open the "Software" tab. If you see packages you recognize, you're done. From then on, the server is scanned automatically every day.
When You Want to Scan Right Away#
Run the following on the server as root. Always run scans as the vuls-saas user (for the reason, see "Permission Denied" in "Common Issues" below).
sudo -H -u vuls-saas /opt/vuls-saas/vuls-saas.sh
Run the following in a Command Prompt started as an administrator (Manual Scan from Command Prompt).
C:\Program files\vuls-saas\vuls-saas.bat
Keep the Scanner Up to Date#
New versions of the scanner are released regularly. If you keep using an old version, some features may not work correctly. Scanner bug fixes are also included only in the latest version. AUTO_REFRESH_BINARY=true in the installation command enables automatic updates. We recommend keeping it. The October 2026 release required a scanner update. You can check the latest version in the Release Notes. For how to update manually, see Updating the Scanner.
Windows 11 26H2 servers require scanner v0.42.0 or later. Older scanners treat them as 25H2 and can't retrieve the application status of updates (KBs). If you scan Windows with proxy settings configured, also update the scan execution script (if it is outdated, the scanner is downloaded again on every scan).
Common Issues#
These are issues we are frequently asked about. If something isn't working, check here first.
When you want to manage third-party products on Windows
Third-party products such as Chrome are not detected by KB. You can detect them by assigning CPEs with "CPE Auto Assignment" in Group Settings. For details, see How to Choose a Scan Method.
When you run into problems during installation
| Symptom | Cause and solution |
|---|---|
[ERROR] Please run as root user. appears |
You are not running as root. Switch to root with sudo su - or a similar command, and then run the same command again |
| The installation command isn't displayed on the screen | You don't have group administrator privileges. Ask a group administrator to grant them to you |
| Installation with yum fails | The installation script uses yum and apt, so it can fail because of problems with them. As a workaround, you can install manually with rpm. For the steps, see "Scanner installation with yum failed, so install it using rpm" |
| Installation fails behind a proxy | Check the scanner's proxy settings and the connectivity requirements (Service Connectivity Requirements) |
| A yum cache is created in /var/tmp/ | This is how the Linux scanner works by design. If you switch to OFFLINE scan, the cache is no longer created, but information in the "Updatable" and "Latest Version" columns is no longer shown (the number of detected vulnerabilities doesn't change). For details, see "A yum cache file is created" |
When you run into problems during scanning
| Symptom | Cause and solution |
|---|---|
| The server doesn't appear in the server list even after waiting 5 minutes or more | Check outbound connectivity and the proxy settings. Also check /opt/vuls-saas/report.log for transmission errors |
Permission Denied appears in scan.log and the scan fails |
If you run a manual scan as root, the owner of the configuration files changes to root, and the scan can no longer run as the vuls-saas user. Restore the owner with chown -R vuls-saas:vuls-saas /opt/vuls-saas/. For details, see "Permission Denied is output to Scan.Log and the scan fails" |
A Timed Out error appears |
The scan exceeded the default timeout (300 seconds). On Linux, add -timeout 600 to ./vuls scan in /opt/vuls-saas/vuls-saas.sh. On Windows, add it to vuls.exe scan in C:\Program files\vuls-saas\vuls-saas.bat. For details, see "A Timed Out error occurs during scanning" |
| The scan succeeds, but the results are not reflected | See "Scan results are not reflected (Linux scan)" |
| A rescan runs automatically a few tens of minutes after a scan error | This is an automatic retry for temporary errors and is by design ("Why does a rescan run automatically a few tens of minutes after a scan error?") |
Troubleshooting#
If something isn't working, see Troubleshooting (FAQ).
If that doesn't solve the problem, contact us through the support contact form. Including the OS and distribution, the command you ran, the error message, and /opt/vuls-saas/scan.log helps us investigate faster.
Learn More#
- Local Linux Scans
- Windows Local Scan
- Scanner Installation Requirements
- Service Connectivity Requirements
- Proxy Configuration
- Updating the Scanner
Next Page#
Once you have registered your other servers with this method too, check your progress in the "After You Register All Servers in the Initial Scope" section of Setup 2: Register Servers and Products.