Preview
This guide is a preview. Its content may change.
Quick Start: Try It on One Server#
Read First
You don't need to finish all the preparation before you start using FutureVuls. First, register just one server and get to the point where your own vulnerabilities appear in the console. This page brings together all the steps so you can get all the way through on this page alone.
Overview of the Three Tasks#
With the following three tasks, you'll be able to see in the console which vulnerabilities your servers have and which ones to address first.
flowchart LR
    A["1. Create one group"] --> B["2. Register one server"]
    B --> C["3. Open Important CVE"]
C --> D["See your vulnerabilities<br>and what to address"]| Order | What to do | To learn more |
|---|---|---|
| 1 | Create one "group," the unit for managing vulnerabilities | Setup 1: Structure Your Account |
| 2 | Choose one server, install the scanner, and register it | Register with Local Scan |
| 3 | Open "Important CVE," which gathers only the detected vulnerabilities you should address | STEP 1: Narrow Down the Vulnerabilities to Address |
The sections below walk you through the three tasks in order.
Before You Begin: Log In#
To access the FutureVuls console, open https://console.vuls.biz/ in your browser and log in.
- If you were invited: An email with a temporary password is sent to the email address you were invited with. Log in with that information and change your password (Adding a User).
- If you forgot your password: Reset it from "Forgot your password?" on the login screen (Password Reset).
After you log in, we recommend enabling two-factor authentication in "User Settings > Profile" (Two-Factor Authentication).
1. Create One Group#
A group is the unit in which you register servers and handle vulnerabilities. One group is enough to start. You'll think about how to divide groups later in "Planning 2: Decide Your Team and Visibility."
- Click the user icon in the upper right of the screen and open "Organization Settings > Group."
- Click "Create a group" below the group list.
- Enter a group name and click "Add." You can change the name later. We recommend creating groups per system, so naming the group after the system you want to manage makes it easy to understand.
- In the dialog that appears, click "Go to Server Registration" to go straight to the screen for "2. Register One Server."
If Organization Settings is not shown
The Organization Settings menu is shown only to users with certain permissions, such as the Owner (Organization Settings). If it is not shown, ask the Owner to create a group. Also ask them to give you group administrator permissions for that group. Then go to "2. Register One Server" in the group they created.
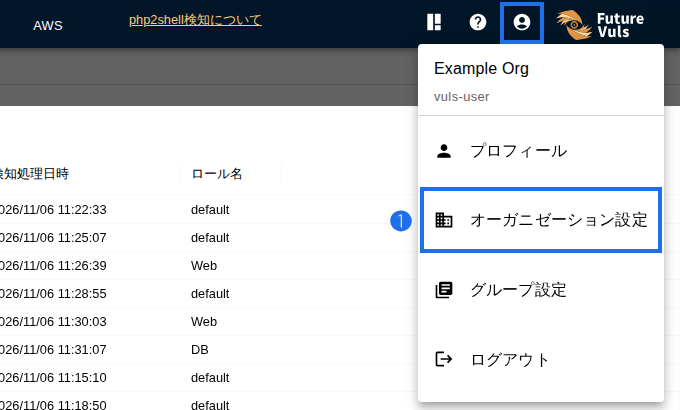
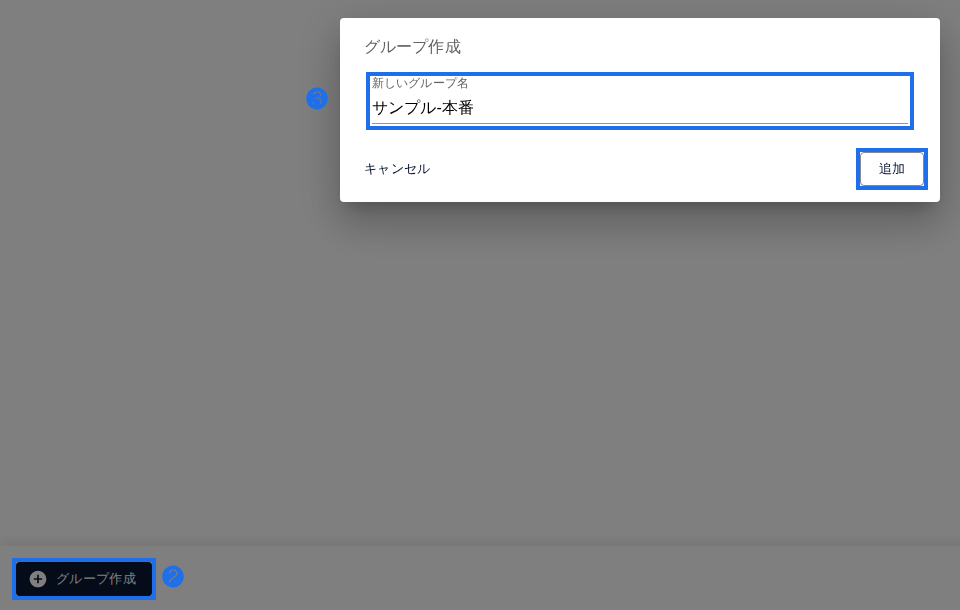
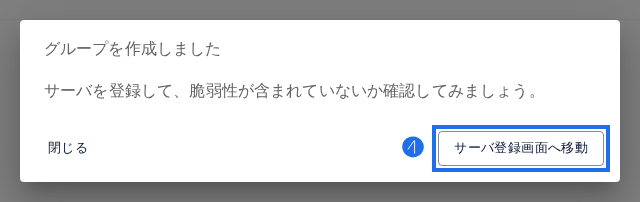
You can also find step-by-step instructions with screenshots in Create a Group.
2. Register One Server#
Choose one Linux server that can connect to the internet and register it with Local Scan. The scanner (a small program that collects a list of software and sends it to FutureVuls) does not change OS or application settings. Installation adds a user for running scans (vuls-saas), files under /opt/vuls-saas, a cron job for scheduled runs, and any required dependency packages (Scanner Installation Requirements).
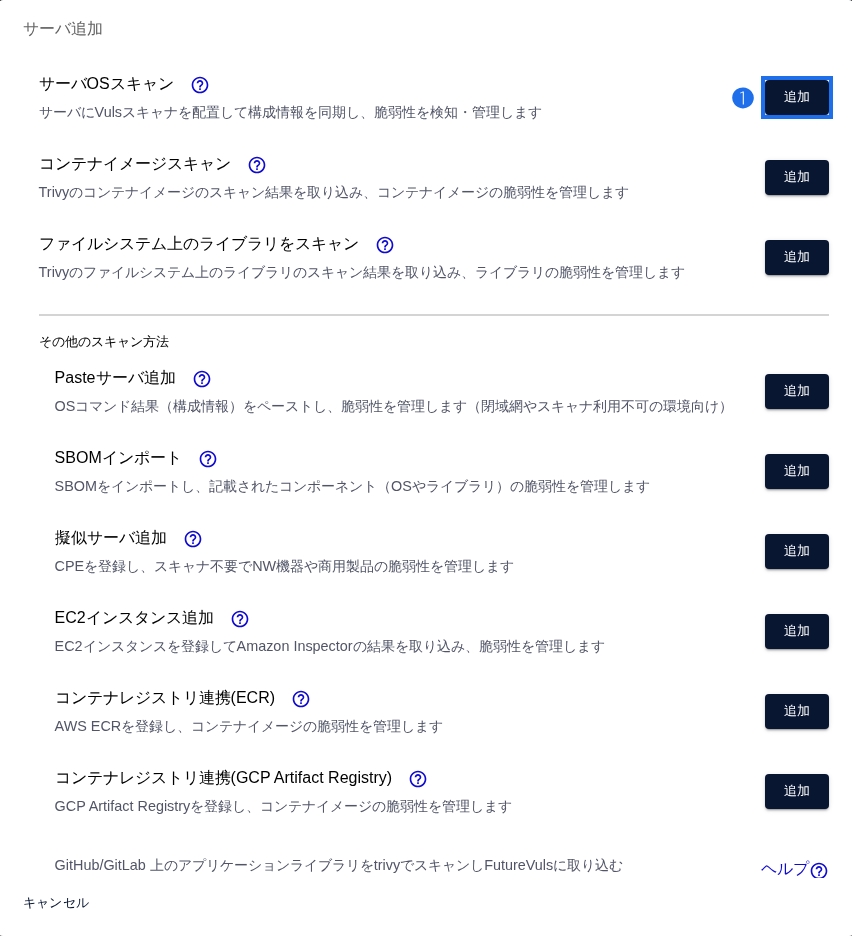
- On the "Server / Product" tab, click "Add Server," and then click "Add" for "Server OS Scan."
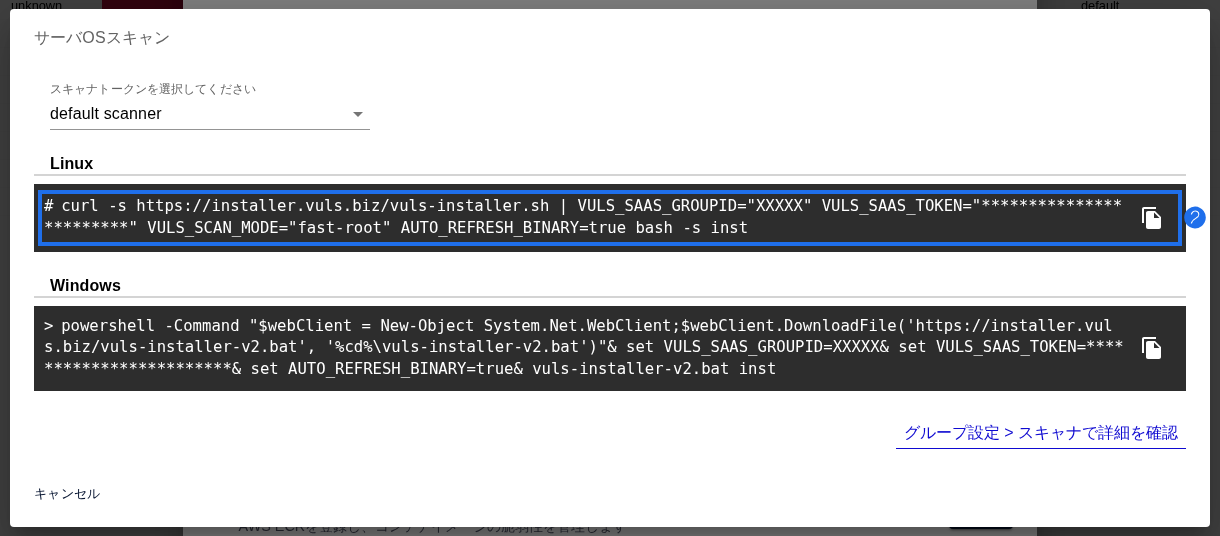
- Copy the installation command for your OS. The command is shown only to users with group administrator permissions.
- Log in to the server as root, then paste and run the command you copied.
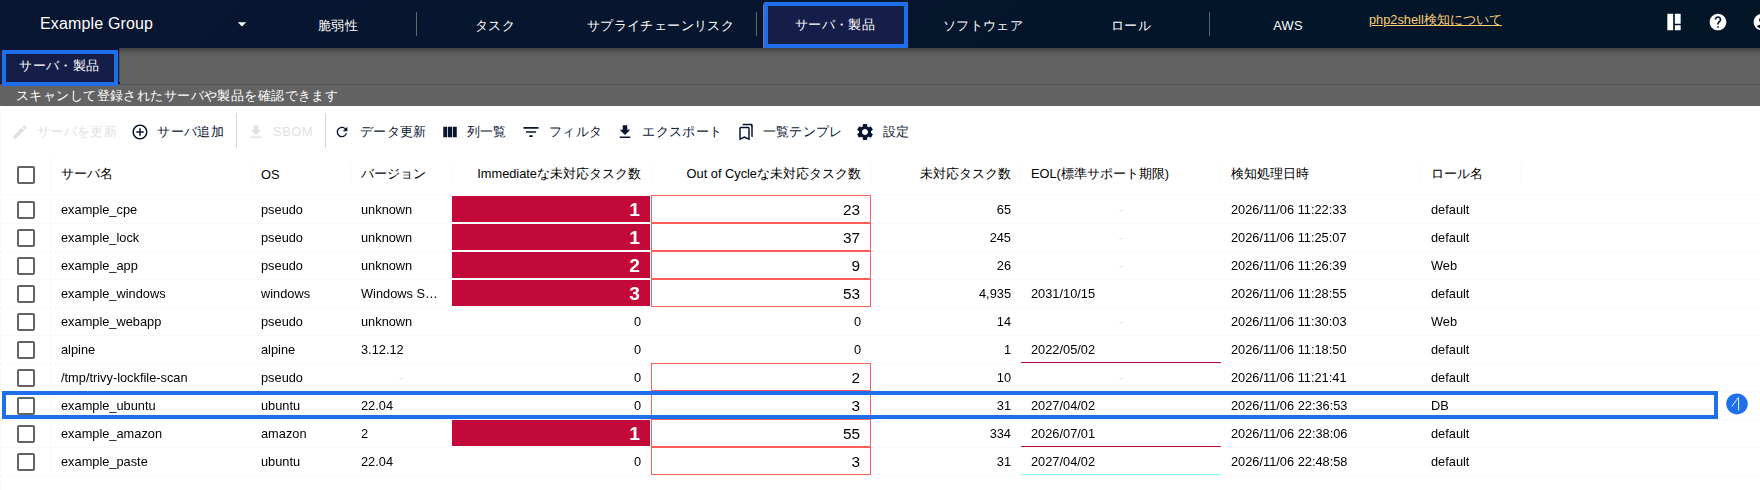
- Wait about 5 minutes, and confirm that a new row has been added to the server list.
How to tell it worked
In step 3, it succeeded if the last line shows [END ] Install scanner finish. In step 4, the server is registered if one new row has been added to the server list.
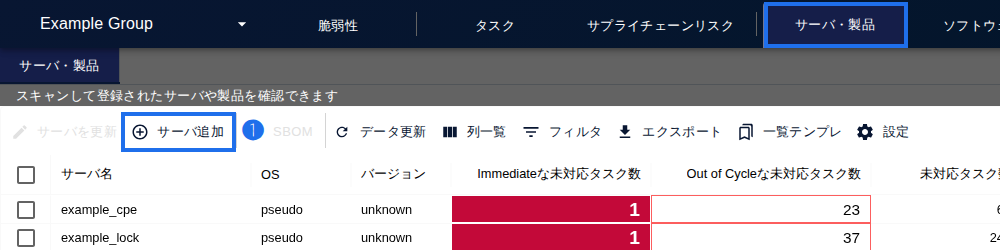
If something doesn't work, or if you have a Windows server or a server on a closed network, see "Register with Local Scan" and "Setup 2: Register Servers and Products."
3. Open "Important CVE"#
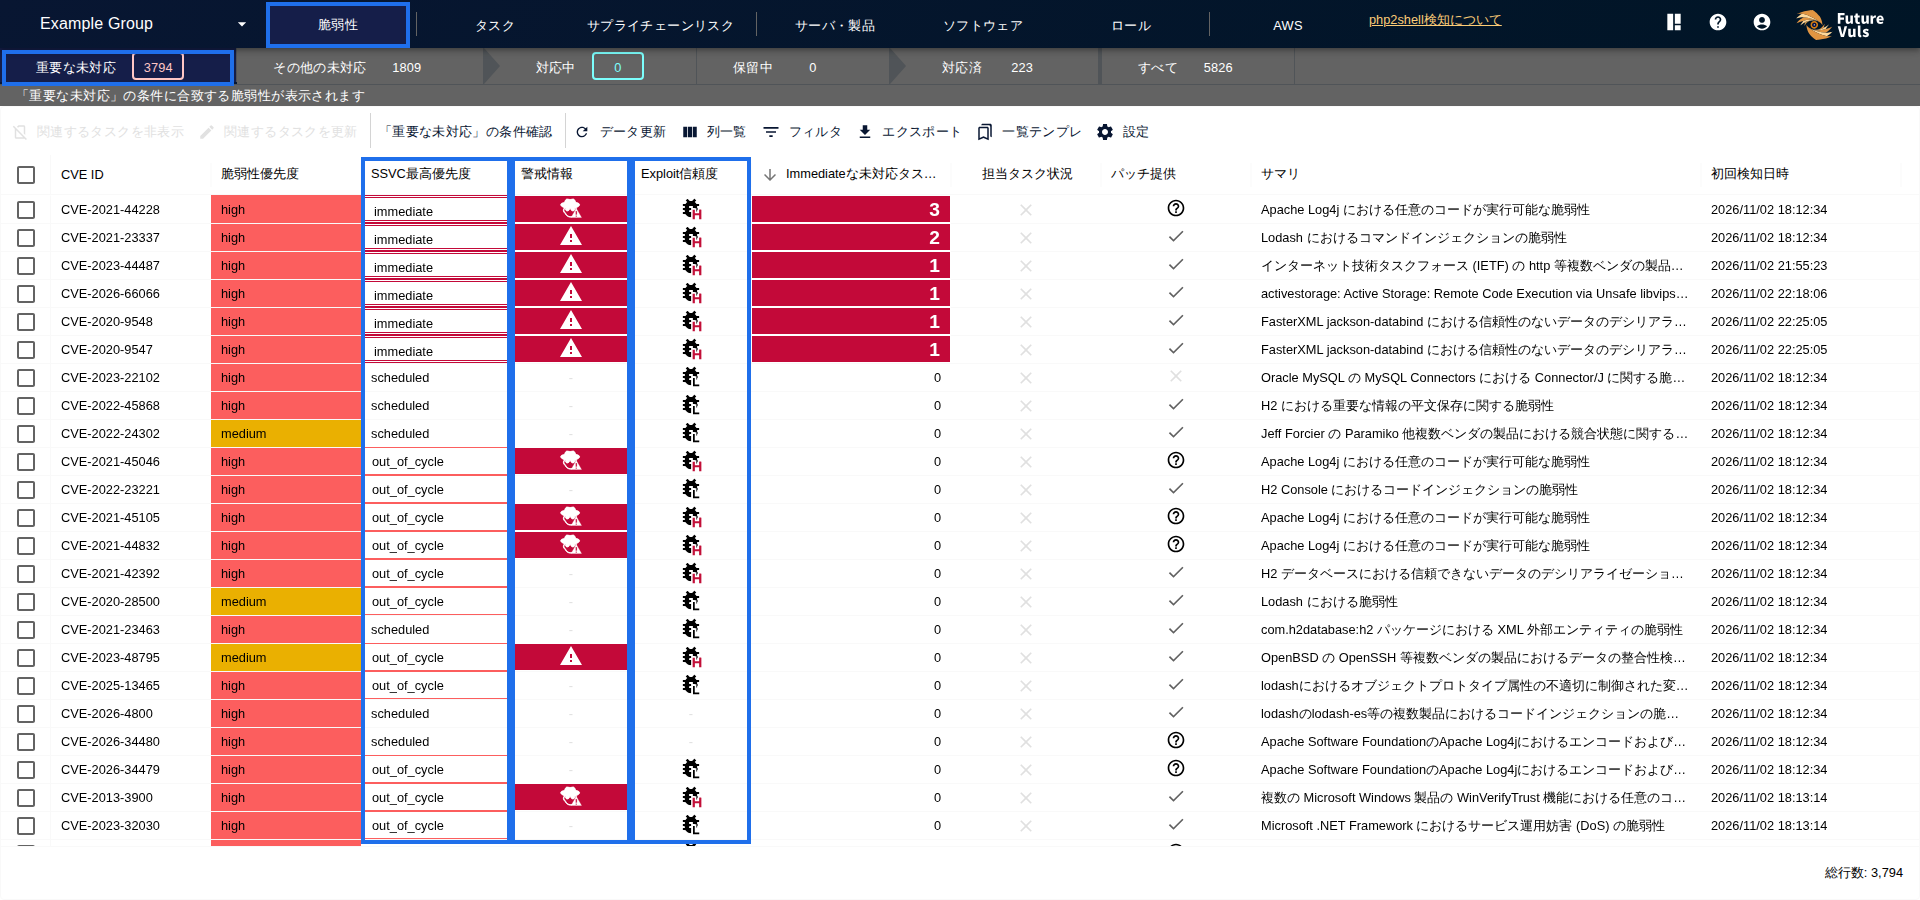
Open "Important CVE" on the CVE tab. "Important CVE" is a list of vulnerabilities that your rules have sorted as "should be addressed" and that you haven't addressed yet. With the recommended conditions that are set from the start, only the vulnerabilities you should address are listed.
If SSVC decisions (CSIRT plan) are available, start by looking at the most urgent ones, "Immediate (immediate response)."
You're done once you get this far
After these three tasks, you can see which vulnerabilities your servers have and which ones to address first.
Troubleshooting#
If something isn't working, see Troubleshooting (FAQ).
If that doesn't solve the problem, contact us through the support contact form.
Next Page#
Once you can see vulnerabilities on your first server, read From Onboarding to Daily Operations to get a sense of the path to setting up your operations.