Preview
This guide is a preview. Its content may change.
Setup 3: Define Prioritization Rules#
For Everyone
Registering servers alone just lists every detected vulnerability; it doesn't tell you which ones to address first. On this page, you set up your company's criteria as rules in FutureVuls so that "the vulnerabilities your company should address" are sorted out automatically.
Start on these settings as soon as you finish registering servers (Setup 2). Aim to finish them by week 8 after signing your contract at the latest (ramp-up milestones). Once you complete this page, vulnerability management starts running as a "system."
What Changes Once You Define Rules#
flowchart LR
    A["Detected vulnerabilities<br>(all)"] --> B["Automatically sorted<br>by your rules"]
    B --> C["Important CVE<br>(the only list you check daily)"]
    B --> D["Everything else<br>(review periodically)"]
Once you define rules, your daily check (STEP 1) only needs to cover "Important CVE." You don't need to look at every item every day.
Turn Your Onboarding Preparation Sheet Answers into Rules#
What you answered in the Onboarding Preparation Sheet becomes the input for these settings.
| Onboarding Preparation Sheet item | Where to configure it |
|---|---|
| B-5, B-6 Internal response criteria (severity levels and due dates for each level) | "Important CVE" conditions and priority-based due dates (Setup 4) |
| B-16 Vulnerabilities you want to treat as needing immediate action | "Important CVE" conditions |
| B-11 Whether to create response requests automatically | Auto Triage |
| B-17 Whether to set due dates automatically | Priority-based due dates (Setup 4) |
If your company has no internal criteria, use "Start with These Settings" on this page.
1. Configure the SSVC Decision Inputs#
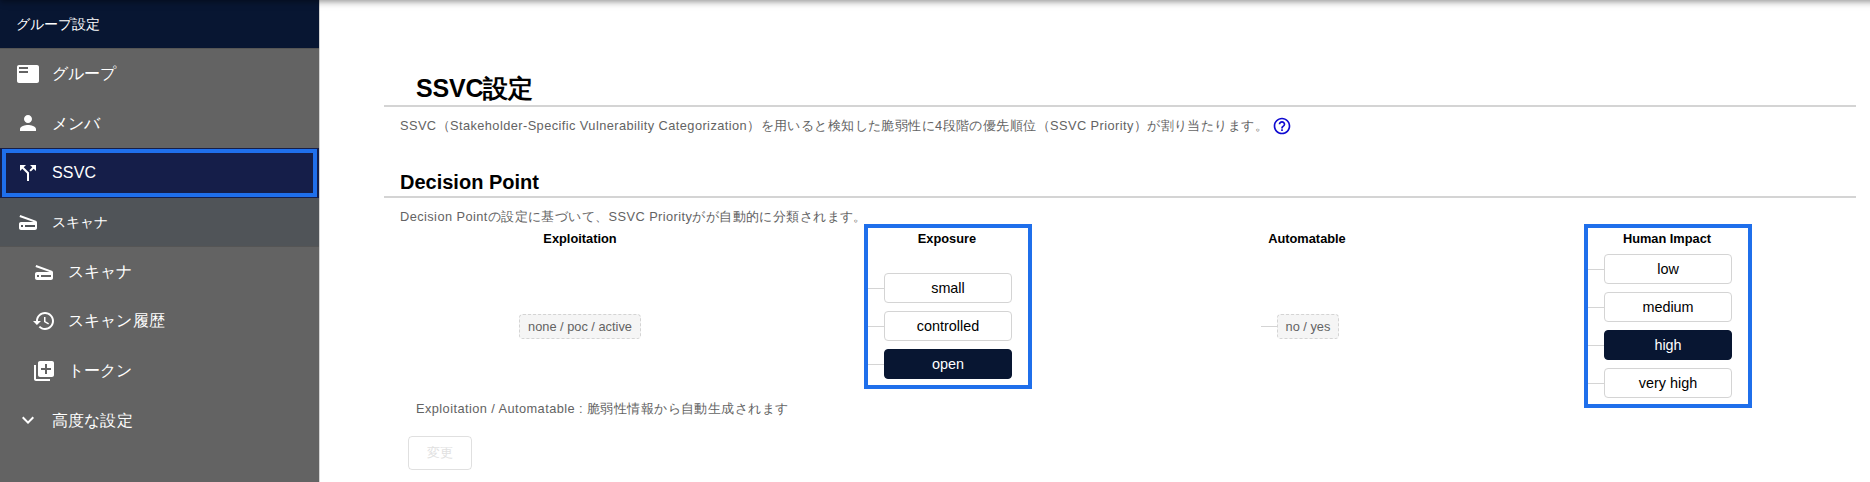
SSVC is a framework that automatically determines, on a four-level scale, "when to fix" each vulnerability based on your company's environment. The decision is made automatically as soon as a vulnerability is detected. SSVC is enabled from the start on the CSIRT plan. On the PSIRT plan, enable it in Organization Settings first (Enabling the SSVC Feature).
The Four Decision Inputs#
| Input | Description | Who decides |
|---|---|---|
| Exploitation | Whether actual attacks have been observed | FutureVuls updates it automatically. Vulnerabilities newly added to KEV (a catalog of vulnerabilities that are actually being exploited) are reflected within about 1 hour |
| Automatable | How readily it can be used in automated attacks | FutureVuls updates it automatically |
| Human Impact (business impact) | How much an attack would affect your business | Your company decides once |
| Exposure (internet exposure) | Whether the system can be reached from outside | Your company decides once |
The Four Decision Levels#
| Level | Meaning |
|---|---|
| Immediate | Immediate response. Address as soon as possible |
| Out-of-Cycle | Out-of-cycle response. Address early without waiting for regular maintenance |
| Scheduled | Planned response. Address during regular maintenance |
| Defer | Deferred response. Do not address for now |
How to Configure#
These settings are displayed in English in the settings screen. Set the default values for "Human Impact (business impact)" and "Exposure (internet exposure)" in Group Settings. Default values are already set when you enable SSVC.
If you want to use different values for each system, set the values on a role and assign that role to the target servers. Values set on a role take precedence over those in Group Settings ("Can I set SSVC Decision Points per server?", Roles).
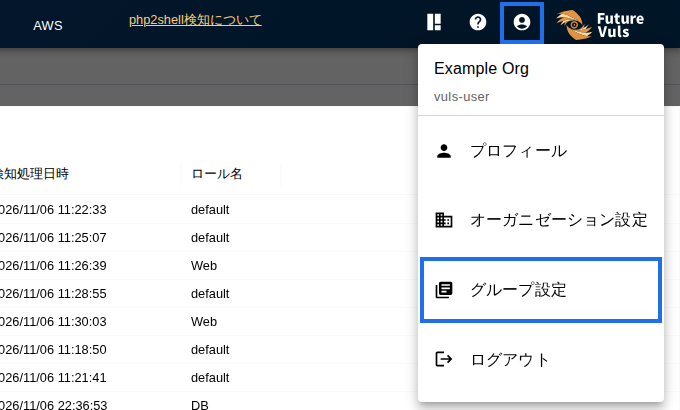
To open Group Settings, click the account icon in the upper right of the screen and select "Group Settings".
Start with These Settings#
If you're unsure, start with the following combinations. Match the Group Settings defaults to the "used only internally, core business system" row, and for groups that include externally exposed servers, match the "externally exposed" row.
| Server type | Exposure (internet exposure) | Human Impact (business impact) |
|---|---|---|
| Externally exposed servers (web, VPN, email, etc.) | open (directly reachable from outside) | high |
| Servers used only internally but directly tied to business operations if they go down (core business systems, authentication infrastructure) | controlled (internal access only) | high |
| Servers used only internally with limited business impact if they go down | controlled | medium |
| Test and development servers | controlled | low |
If you're unsure, set the values higher, and lower them if there are too many "Important CVE" items to check every day. Setting values high and adjusting with filters is safer than setting them low and missing something.
2. Define the "Important CVE" Conditions Based on Your Company's Criteria#
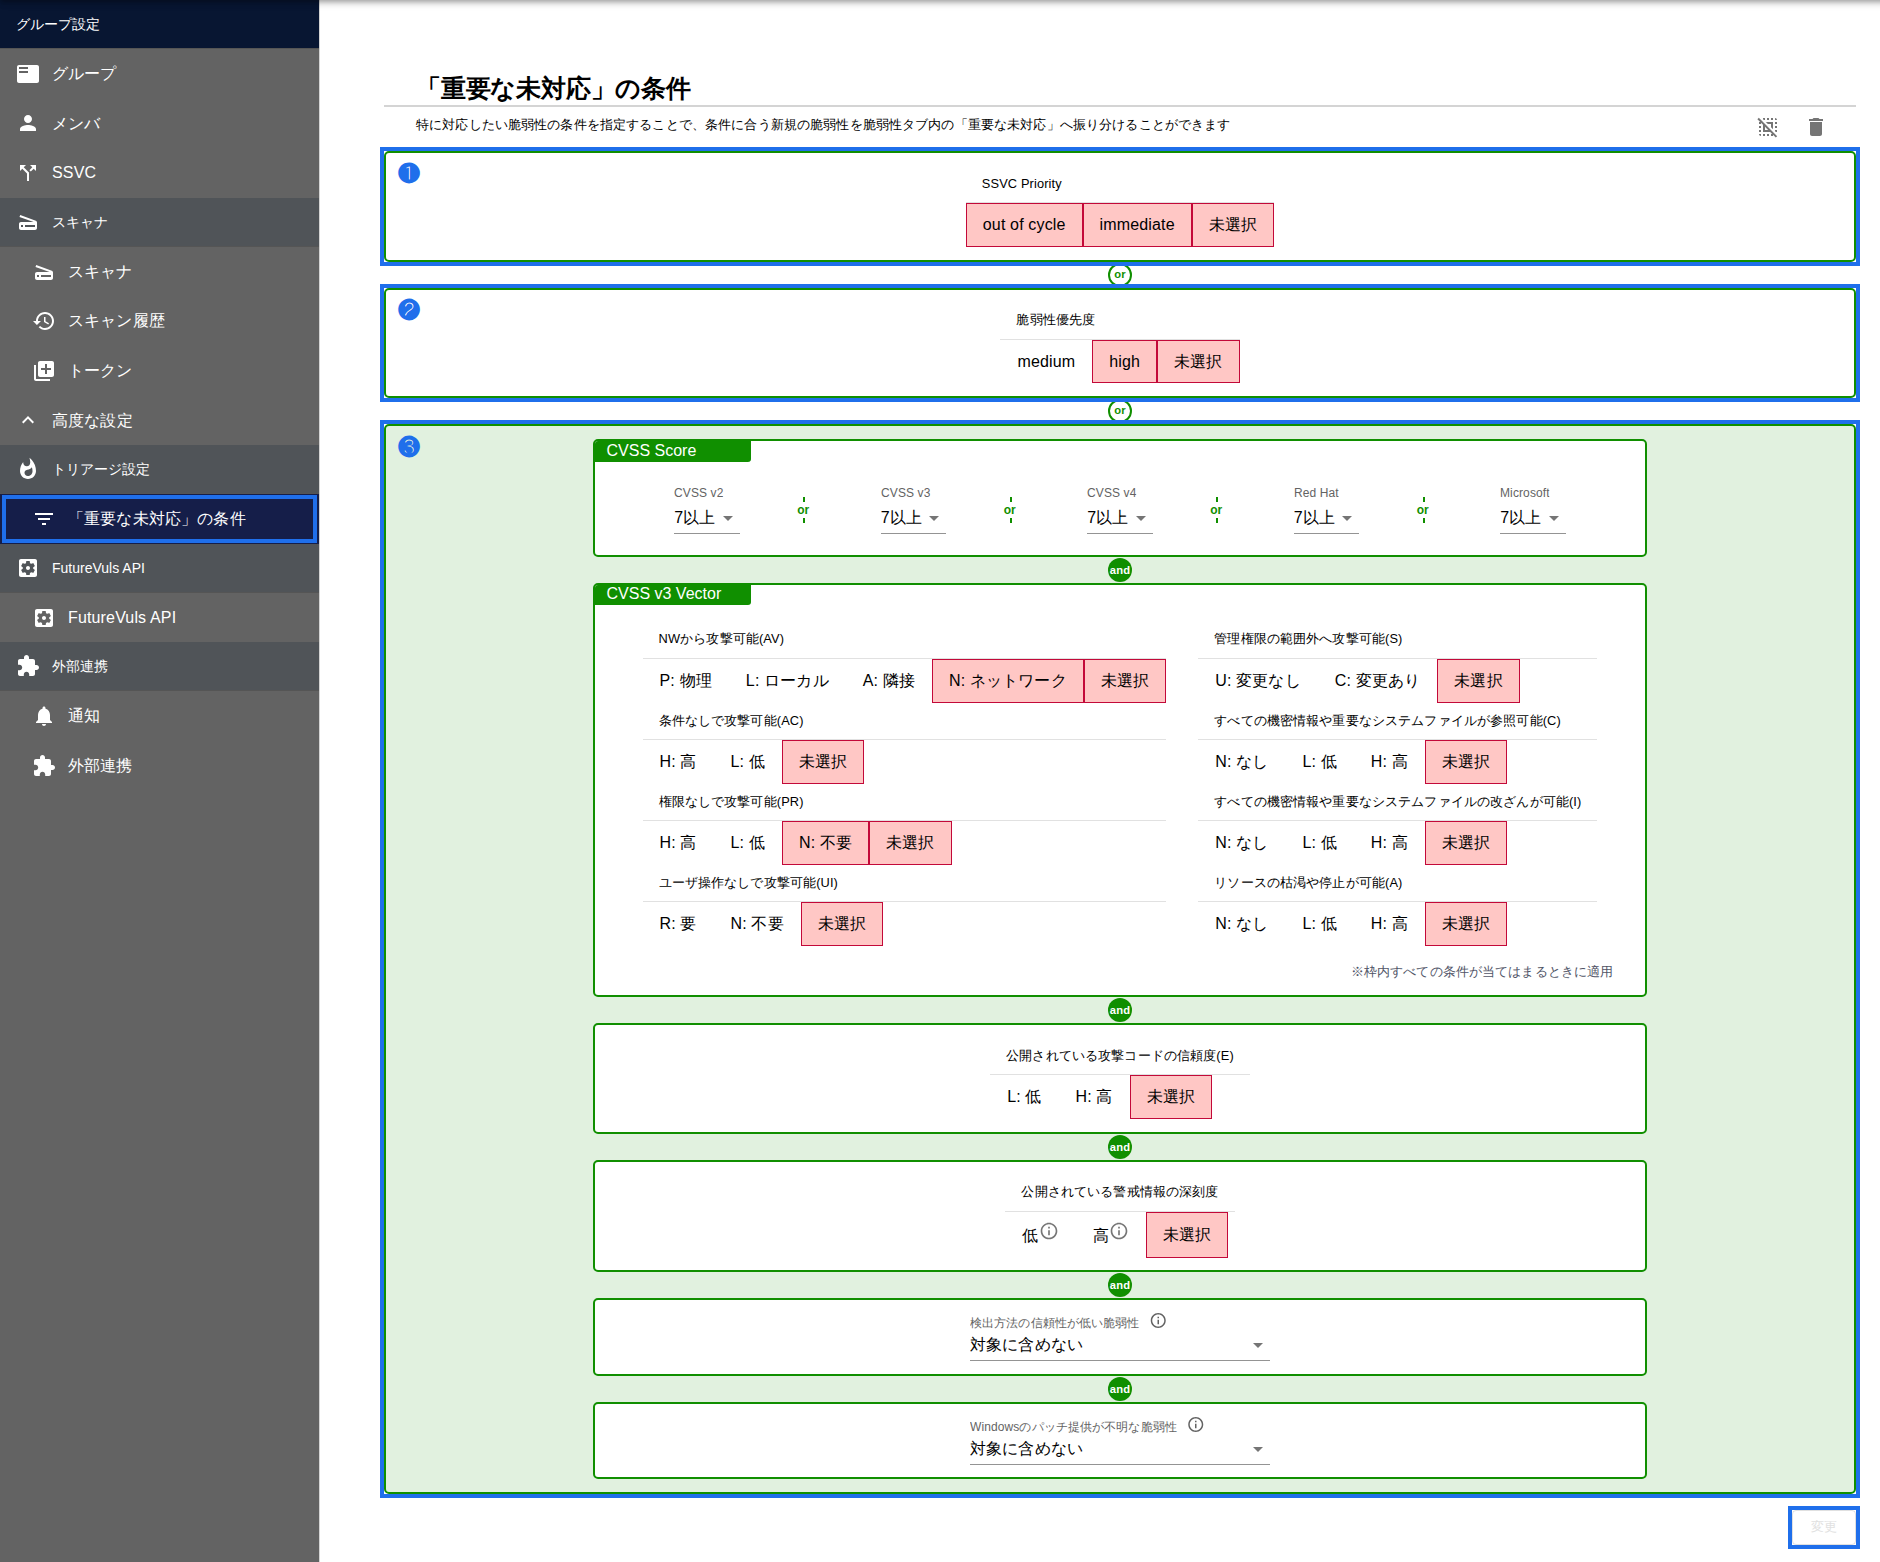
A vulnerability is added to "Important CVE" if it meets any one of the following three conditions. In a group newly created on the CSIRT plan, only condition 1 is set at first, and conditions 2 and 3 are not selected. Use these initial conditions as a starting point, adjust them to your company's criteria, and save them.
| Condition | Description | Mapping to Onboarding Preparation Sheet B-16 |
|---|---|---|
| 1. SSVC Priority | Vulnerabilities determined to be "Immediate" or "Out-of-Cycle" | — |
| 2. Vulnerability Priority (a priority such as high, medium, or low that FutureVuls assigns to each vulnerability; it is separate from the SSVC decision) | On the CSIRT plan, this is not selected at first. To use it, select "high" or "medium" or higher | — |
| 3. Vulnerability Characteristics | Vulnerabilities that meet all of the items you set for CVSS score, CVSS v3 vector, exploit code reliability, and security advisory severity | Set criteria such as "CVSS of X or higher," "confirmed to be used in attacks," or "exploit code is public" here |
How to Configure#
- From "Advanced Settings" > "Triage Settings" in Group Settings, open the settings screen for the "Important CVE" conditions.
- Select the conditions you want to use. You don't need to select items you won't use.
- Click "Change" to save.
Start with These Settings#
- At first, use the conditions as they were when the group was created. If you use SSVC, condition 1 (Immediate or Out-of-Cycle) alone is enough.
- If there are too many to check every day, narrow down the conditions you are already using. For example, set condition 1 to "Immediate" only. Raise condition 2 from "medium" to "high." In condition 3, add "exploit code reliability" or "security advisory severity" to its items. A vulnerability is included if it meets any one of the three conditions, so adding a condition you were not using does not reduce the number of items.
- If there are so few that you feel uneasy, select "high" for Vulnerability Priority in condition 2. If there are still too few, widen it to "medium."
- About 4 weeks after you start operations, check whether the number of "Important CVE" items is manageable to review every day (guideline: 10–20 items per person), and review the conditions.
3. Set Up Auto Triage#
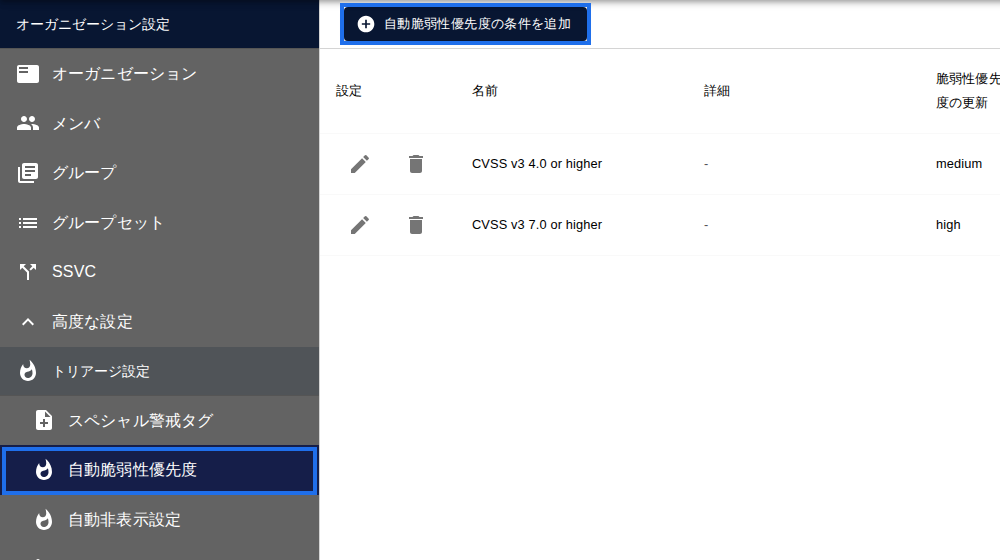
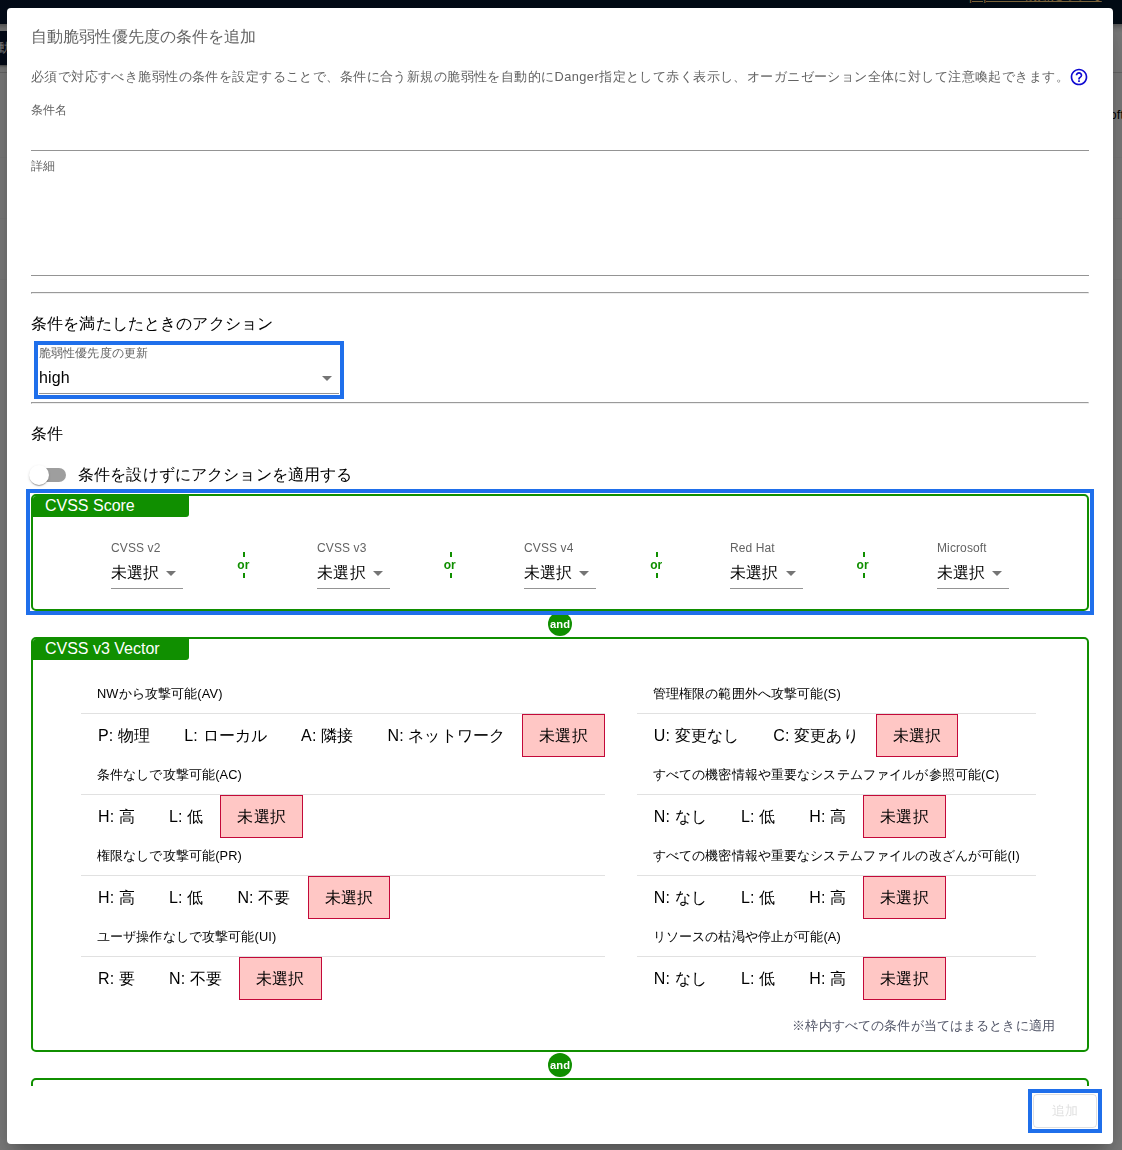
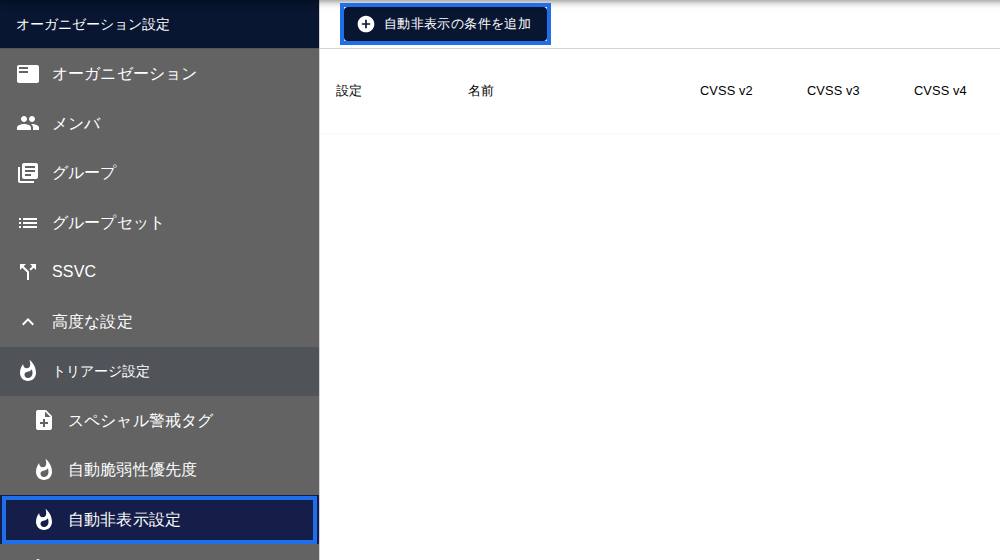
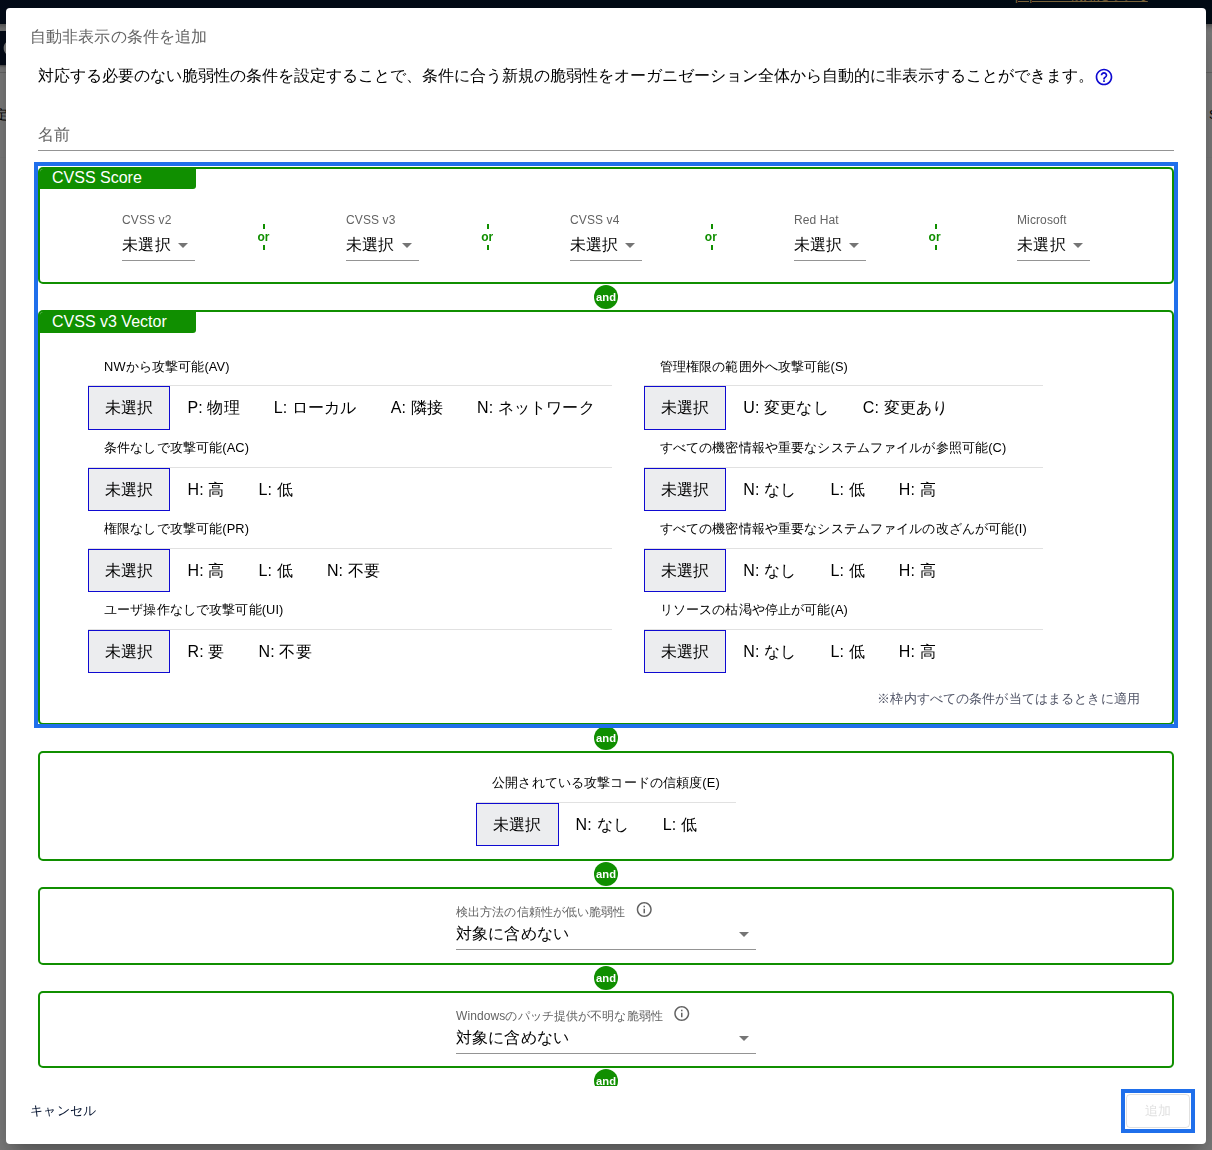
Auto Triage is a feature that automatically assigns priorities to vulnerabilities that meet the conditions you set, or automatically hides those that don't need to be addressed. It reduces the effort of daily sorting. Auto Triage is a CSIRT plan feature (Auto Triage). You specify conditions using the same items as "Important CVE" (CVSS score, exploit code reliability, etc.). Settings are also applied to existing vulnerabilities and tasks from the next scan after you configure them. Automatic Ignore Settings apply only to tasks with the status "New (NEW)," and tasks with a priority of high are not hidden.
| Feature | What it does | Example use |
|---|---|---|
| Automatic Vulnerability Priority | Automatically assigns a priority to vulnerabilities that match the conditions | Avoid manually assigning "top priority" under your internal criteria every time |
| Automatic Ignore Settings | Automatically removes vulnerabilities that match the conditions from the list | Remove from your daily check the types of vulnerabilities you've already determined don't affect your environment |
To set these up, open the "Automatic Vulnerability Priority" or "Automatic Ignore Settings" page under "Advanced Settings" > "Triage Settings" in the left menu of Organization Settings. On each page, click "Add Automatic Vulnerability Priority condition" or "Add Automatic Ignore condition" to create a condition.
Hidden vulnerabilities are not deleted. Review your hide conditions periodically, for example every six months.
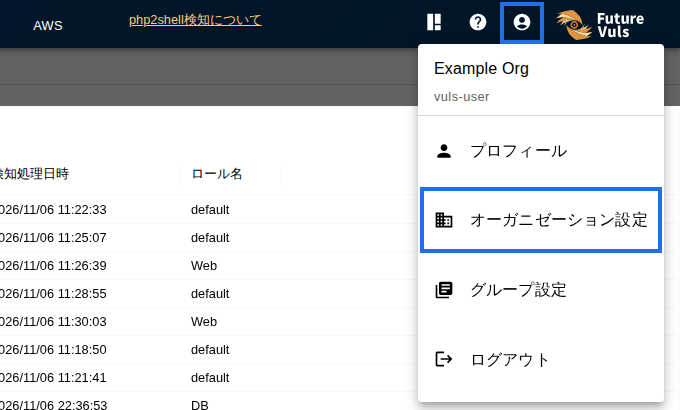
To open Organization Settings, click the account icon in the upper right of the screen and select "Organization Settings".
When Changes Take Effect#
Changed settings are also applied to existing tasks at the next scan. To apply them right away, run "Manual Scan of All Servers" in Group Settings (up to 500 servers at a time).
Due dates set automatically by SSVC do not overwrite Special Alert Tags or due dates entered manually. Other due dates are updated when no due date is set, when the new due date is earlier, or when the current due date has passed (SSVC Due Date).
Common Issues#
| Symptom | Cause and solution |
|---|---|
| There are too many "Important CVE" items | The ranges of the "Vulnerability Priority" or "Vulnerability Characteristics" conditions may be too broad. Narrow them down to match your company's criteria |
| Nothing appears in "Important CVE" | The conditions may be too strict. If you reset the "Important CVE" conditions to their defaults, values are set for all of conditions 1–3, and the scope widens. Unlike the initial state of a newly created group (condition 1 only), after you reset to the defaults, all three conditions are set. First, reset to the defaults and check |
| Tasks hidden in the console also appear when retrieved through the API | By default, the API also retrieves hidden tasks. Add ?filterIgnore=true to match what the console shows ("Shown as resolved in the console… but when retrieved through the API…") |
| What should I do with vulnerabilities that didn't make it into "Important CVE"? | You don't need to do anything. "Important CVE" is a list of vulnerabilities with the status New that are not hidden, narrowed down by your company's rules, so leave those that didn't make it in as "New" and review them periodically. For those you decide during review not to address for now, set them to "Defer (DEFER)" to keep a record of the decision. Use "Hide" for items that you never need to look at again, such as those outside your management scope. For tasks with an SSVC decision of Defer, you can automatically set the status to "Defer (DEFER)" with SSVC Triggers & Actions. If you also set the status to return to "New" when the decision rises to Immediate or Out-of-Cycle, you won't miss items that have become urgent (SSVC Triggers & Actions). Use Automatic Ignore Settings only for items outside your management scope. |
Troubleshooting#
If something isn't working, see Troubleshooting (FAQ).
If that doesn't solve the problem, contact us through the support contact form. Including your current settings and the behavior you expect will help us investigate faster.
Learn More#
- Important CVE Conditions (Important Filter)
- SSVC
- Auto Triage
- What Is SSVC?
- Triage Settings in the CSIRT Plan
Next Page#
Once your rules are set, configure assignees, due dates, and notifications. Go to Setup 4: Set Assignees, Due Dates, and Notifications.