Preview
This guide is a preview. Its content may change.
Setup 4: Set Assignees, Due Dates, and Notifications#
For Everyone
To reduce the effort of daily assignment, set up assignees, due dates, and where notifications are sent. Once you configure each of these, they work automatically from then on.
Aim to finish these settings by week 8 after signing your contract (ramp-up milestones).
1. Check the Assignee for Each Server#
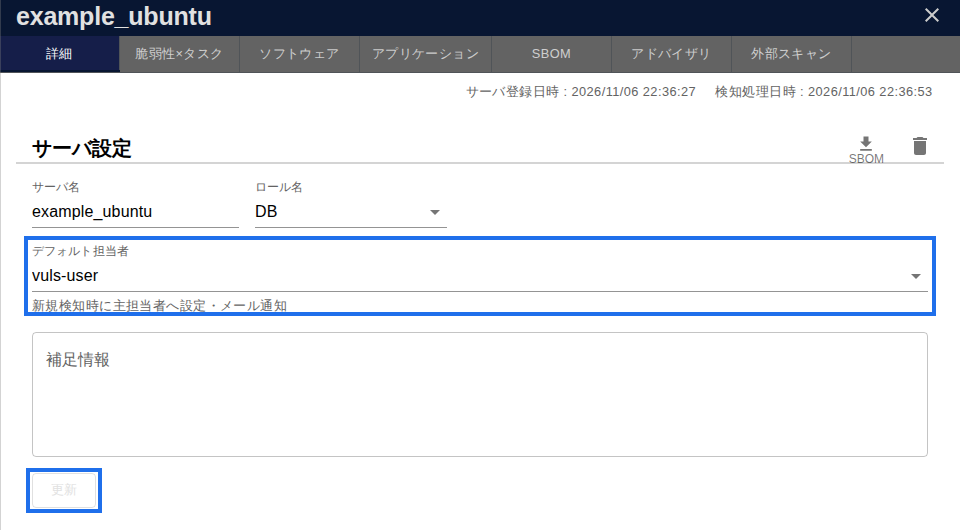
Tasks are automatically assigned to the server's "Default Assignee." When you register a server, the group's default assignee is set as the server's initial value (you set this in Setup 1: Structure Your Account). However, for pseudo servers and paste servers added from the console, the person who added them is set instead.
In the server list, check that each assignee matches the person you decided on in Planning 2: Decide Your Team and Visibility under "who to ask to handle fixes." For any server that doesn't match, change it in the server details settings. You can also select multiple servers in the server list and change them all at once (Server / Product Tab).
2. Set Due Dates Automatically Based on Priority#
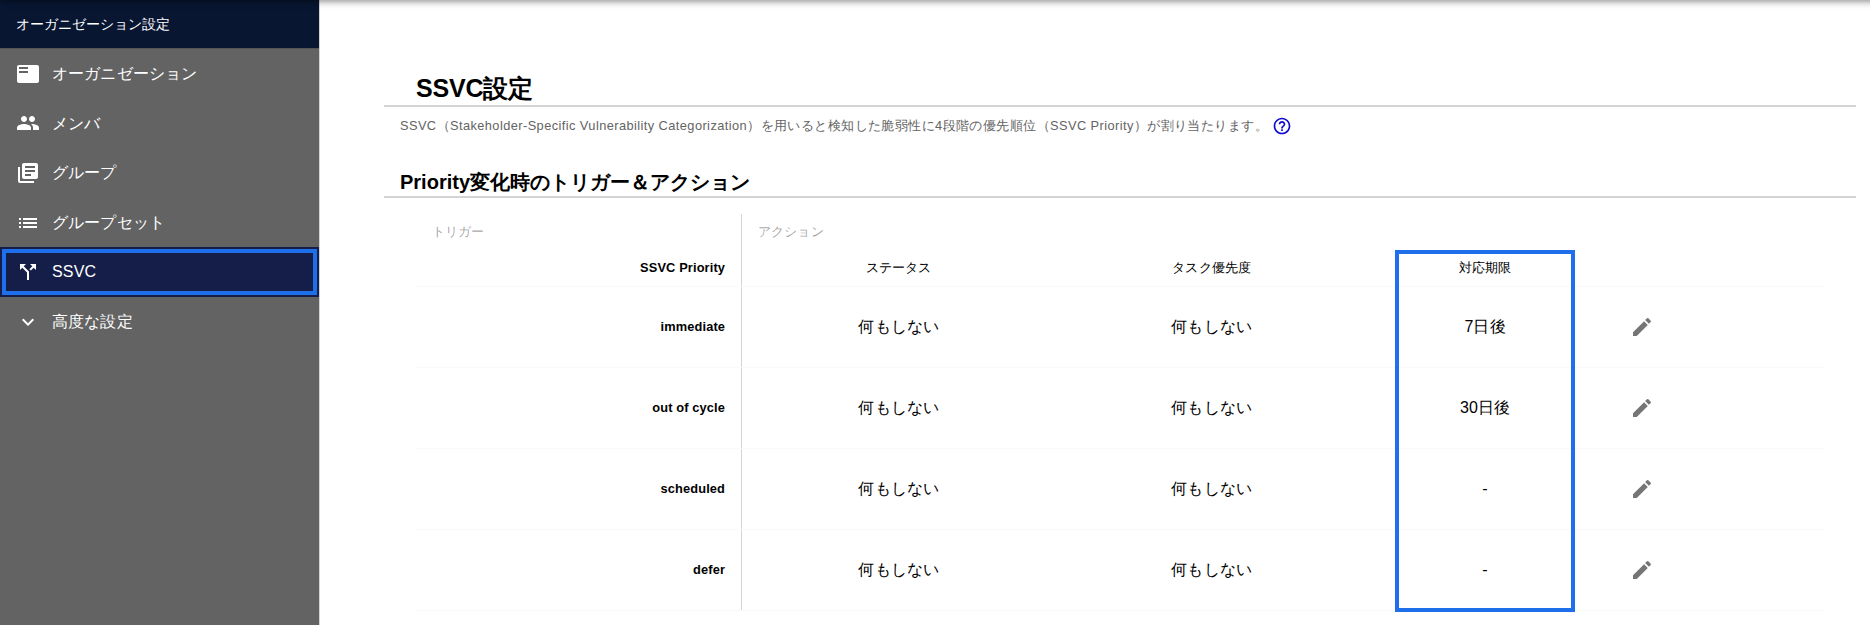
Once a priority is determined, a corresponding due date can be set automatically. If your company has criteria for response due dates, match them. If not, decide on your own criteria using the following example as a reference. Configure automatic due dates in "SSVC Triggers & Actions" in Organization Settings or Group Settings (SSVC).
| SSVC decision | Example due date | Approach |
|---|---|---|
| Immediate (immediate response) | Within 7 days | Address it on an ad hoc basis without waiting for regular maintenance |
| Out-of-Cycle (out-of-cycle response) | Within 30 days | Move up your plans and address it without waiting for the next regular maintenance |
| Scheduled (planned response) | The next regular maintenance date (e.g., every 3 months) | Address it at the next regular maintenance |
| Defer (deferred) | No due date | At the review every 3 months, check whether the decision has changed |
The numbers of days in the table are only examples. In the product, you set due dates for Immediate and Out-of-Cycle as "a number of days after the decision." For Scheduled and Defer, you set due dates by the regular maintenance cycle (e.g., every 3 months) rather than a number of days.
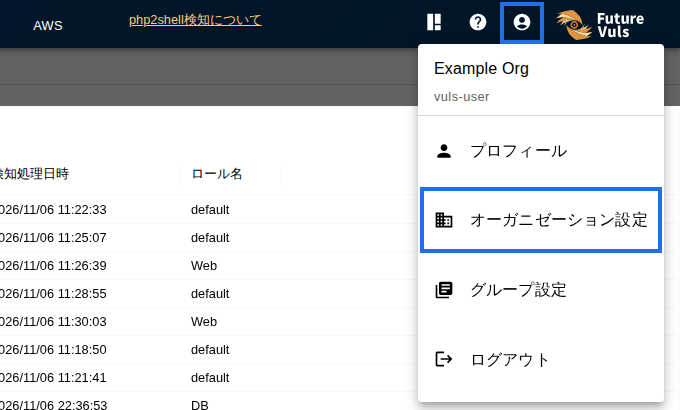
To open Organization Settings, click the account icon in the upper right of the screen and select "Organization Settings".
If your company's policies or audit requirements specify due dates, give those priority.
3. Send Notifications to Slack or Teams#
Notifications about tasks being assigned or updated are sent to assignees by email. Detections of tasks determined to be "Immediate," detections of vulnerabilities confirmed to be exploited, the Daily Report, and more can also be sent to Slack or Teams. We recommend setting this up so nothing slips through in your daily checks. Notifications about exploited vulnerabilities are sent either together per group or per server, depending on how the vulnerability was found (How Notifications Are Grouped and When They Arrive). If you don't need them, you can turn them OFF in Group Settings or Webhook settings. For the language of notifications, see Language Settings.
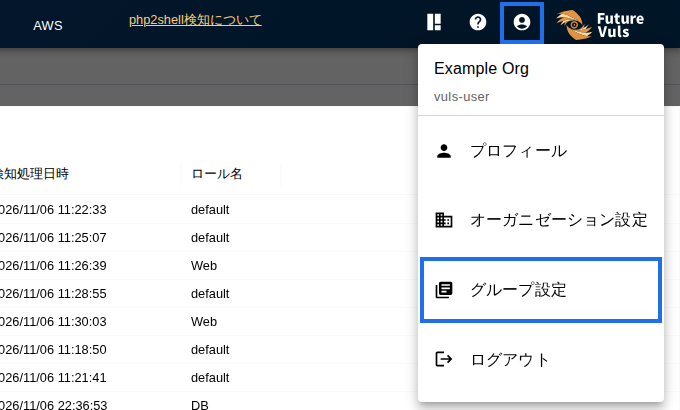
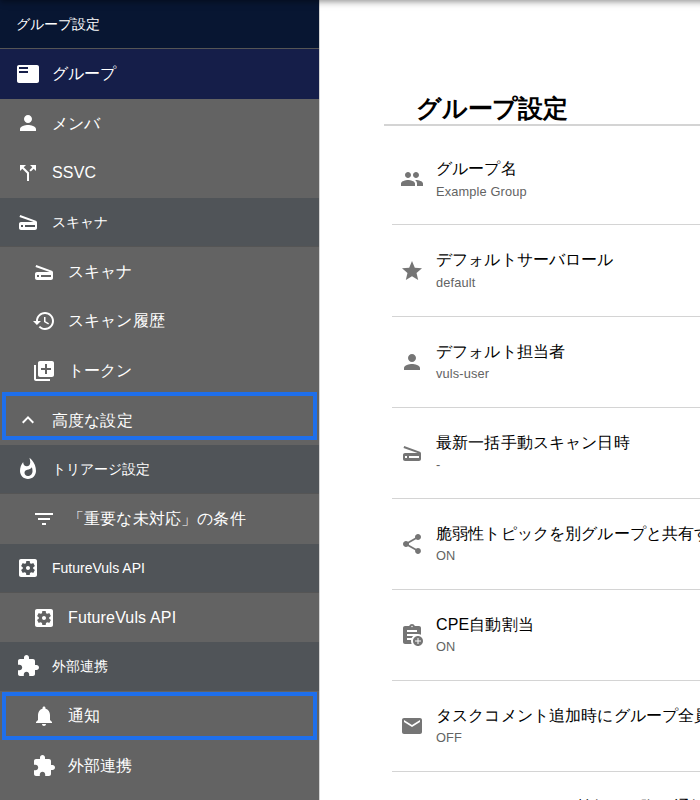
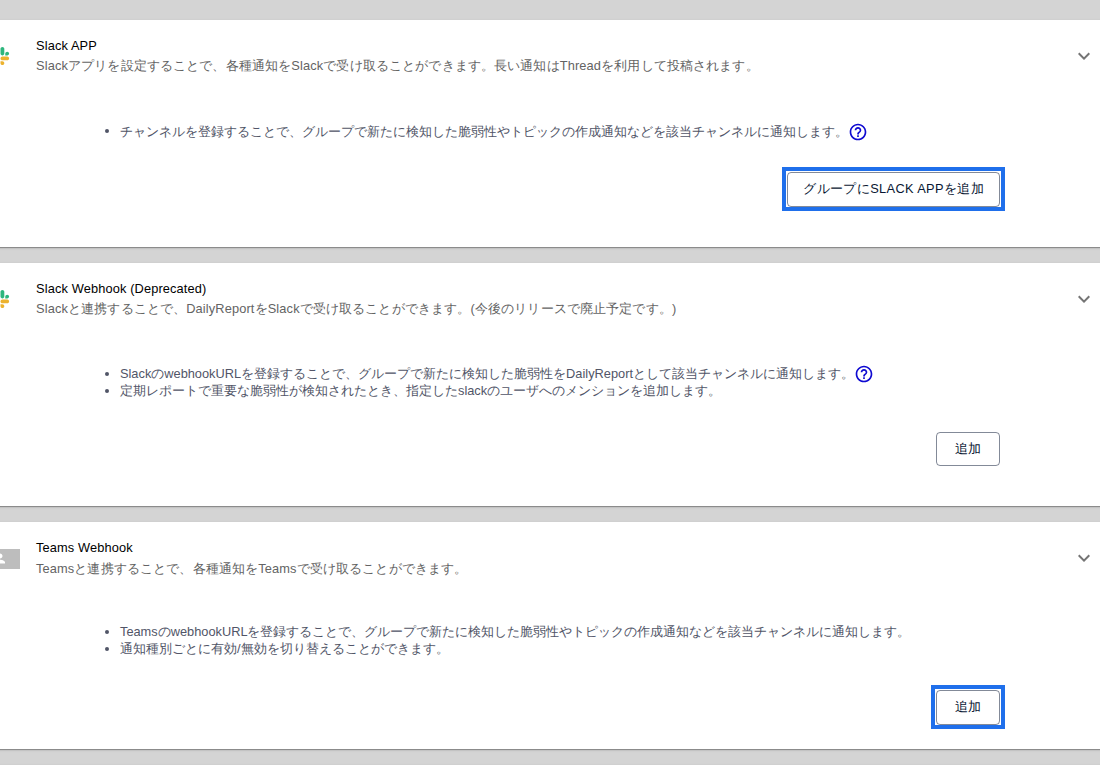
Set this up under "Advanced Settings" > "External Integrations" > "Notifications" in the left menu of Group Settings. For Slack, use "Add Slack App to Group" under "Slack APP"; for Teams, use "Add" under "Teams Webhook". "Slack Webhook" is deprecated, so use Slack APP for new setups. For details, see Notification Feature, Slack App, and Teams.
Troubleshooting#
- Notification emails aren't arriving: When Notification Emails Do Not Arrive
- Not sure how due dates work: Managing Tasks (Statuses and Due Dates)
If that doesn't solve the problem, contact us through the support contact form.
Learn More#
Next Page#
Once setup is complete, start daily operations. Go to STEP 1: Narrow Down the Vulnerabilities to Address.