Preview
This guide is a preview. Its content may change.
Register with Paste Scan#
Read Only the Method You Use
With this method, you run commands on a server and paste the output into the FutureVuls screen to register it. Nothing is installed on the server and the server makes no outbound connections, so you can register servers even on closed networks with no internet access.
Suitable Environments and Limitations to Know#
| Well suited for | Limitations to know |
|---|---|
| Servers on closed networks isolated from the internet | You need to re-paste every time the configuration changes |
| Servers where you can't add software due to change management or product warranty requirements | Compared with scanner-based methods, it can't collect whether a reboot is required, whether package updates are available, or which Windows updates are not yet applied |
Check the supported OSes and versions in Supported Environments.
You can also register Oracle Solaris 10 and 11 servers with Paste Scan (beta). For the steps and detection coverage, see Solaris Paste Scan.
Steps#
1. Add a Paste Server#
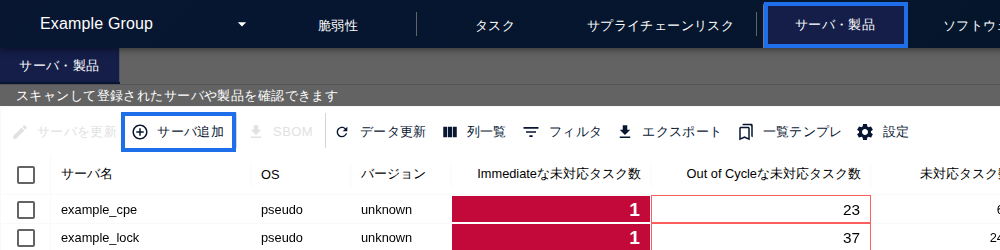
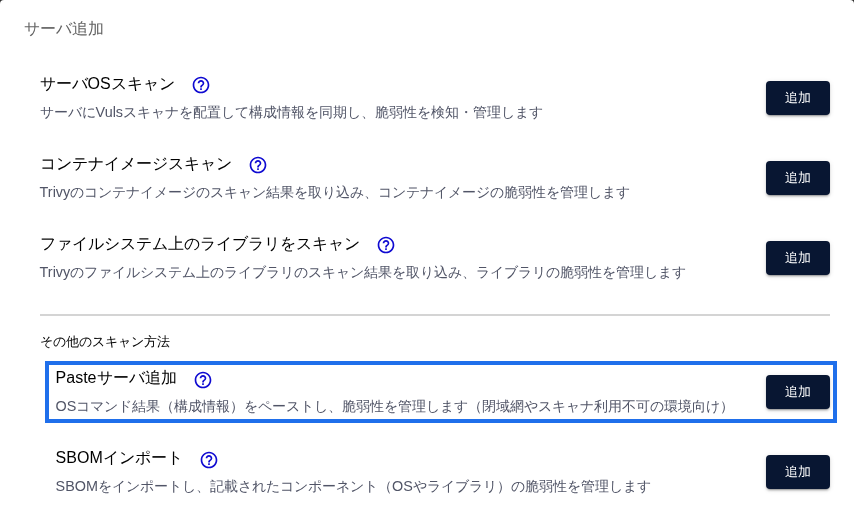
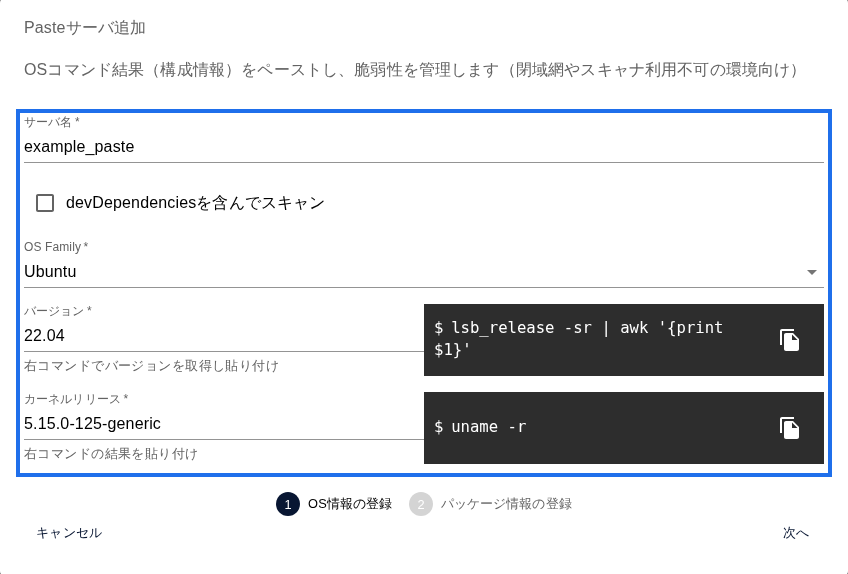
On the Server / Product tab, click "Add Server", and then click "Add" next to "Add Paste Server". Enter a server name (the display name in FutureVuls) and select the OS type. Use the commands shown on the screen to find the OS version and kernel release, and enter them.
# 例:Ubuntu の場合(画面に OS ごとのコマンドが出ます)
lsb_release -sr | awk '{print $1}'   # バージョン
uname -r                                # カーネルリリース
2. Paste the Package Information#
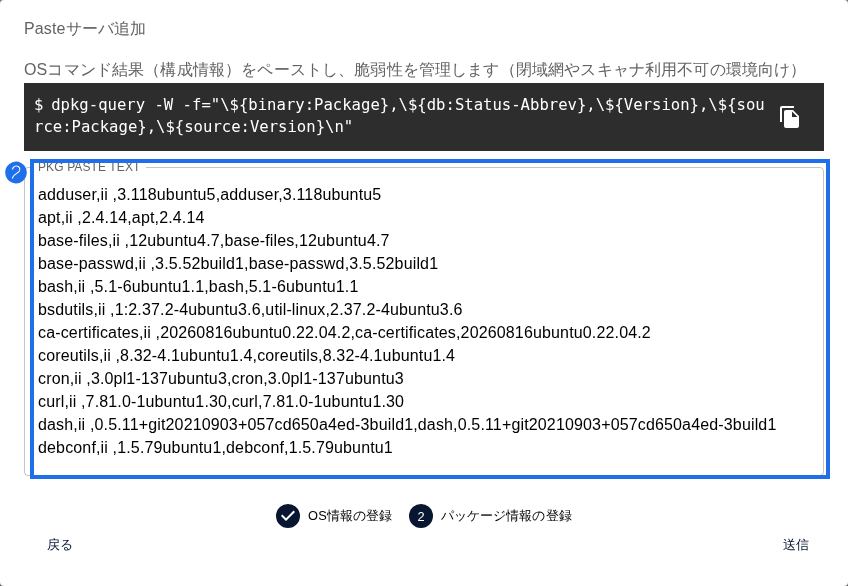
Run the commands shown on the screen on the server, paste the output from the first line to the last without omitting anything, and click "Submit".
- Copy the commands exactly as shown on the screen. The arguments differ by OS.
- If the output is long, write it to a file first and then take it off the server (for example,
rpm -qa ... > pkgs.txt). - On Windows, run two commands in PowerShell and paste the list of updates (KBs) and the list of installed packages, in that order. If KB information is missing, you can fill it in after registration with Manual KBID Registration (Manual KBID Registration). You can also use this when KB information is missing on a Windows server registered with the scanner.
3. Check the Detection Results#
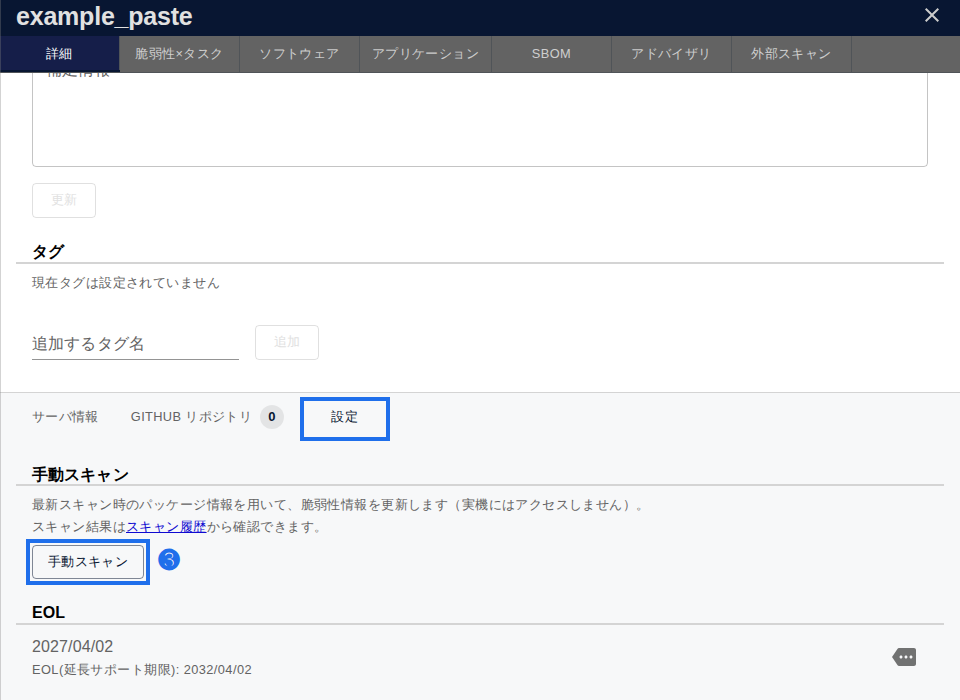
When you click "Submit", vulnerability detection runs automatically for both Windows and Linux. Detection results appear within a few minutes. To re-detect later with the latest vulnerability information, click "Manual Scan" on the "Settings" tab at the bottom of the server details.
How to tell it worked
If familiar packages appear on the Software tab, the paste was successful.
Re-Paste After Applying Patches#
With Paste Scan, configuration information isn't updated automatically. After you apply patches, open "Update Paste Server Configuration Information" on the "Settings" tab of the server details, click "Update Configuration", and re-paste the latest output. In the scan after you re-paste, tasks for updated packages automatically change to "Patch Applied (PATCH_APPLIED)".
If you forget to re-paste, vulnerabilities you've already fixed will keep showing up. We recommend adding "re-paste" to your patching procedure.
Common Issues#
| Symptom | Cause and solution |
|---|---|
| No vulnerabilities appear after submitting | Wait a few minutes and reopen the list. If they still don't appear, check that the pasted output isn't cut off (it must include everything from the first line to the last) |
| Tasks remain after applying patches | You haven't re-pasted the configuration information. Follow "Re-Paste After Applying Patches" above |
| Tasks don't change to "Patch Applied" after applying patches | Check the "Patch Availability" column in the list. For vulnerabilities without fixed-version information, FutureVuls can't automatically determine whether the fix has been applied. For details, see "Task Doesn't Change to PATCH_APPLIED After Updating" |
Troubleshooting#
If something isn't working, see Troubleshooting (FAQ).
If that doesn't solve the problem, contact us through the support contact form. Including the OS and version, the beginning of the pasted content, and any error messages helps us investigate faster.
Learn More#
Next Page#
Once registration is complete, check your progress in the "After You Register All Servers in the Initial Scope" section of Setup 2: Register Servers and Products.